User Interface Guide
The footer of the EMILY.RPA main interface serves as the primary navigation area, allowing you to switch between four pages: "SKILL", "TRIGGER", "REPORT", and "CONFIG". The header and content change accordingly. As information accumulates with use, you can drag the left or right edge of the window to increase its width, but the height is fixed.
On macOS, you can find a lightning bolt icon in the menu bar at the top of the desktop; on Windows, it appears in the system tray at the bottom. Clicking the icon opens a menu that lets you "Show" or "Hide" the EMILY.RPA interface, allowing you to use the desktop while EMILY.RPA runs in the background. Note that when running Desktop Automation, EMILY.RPA takes control of the mouse and keyboard — if the user is also operating the desktop, this will cause interference and likely lead to automation failures. The "Check for Updates" option in the menu immediately checks for new versions; EMILY.RPA also checks automatically on launch. Clicking "Customer Support" opens a web page where users can submit support requests, limited to non-technical issues such as product usage and billing.
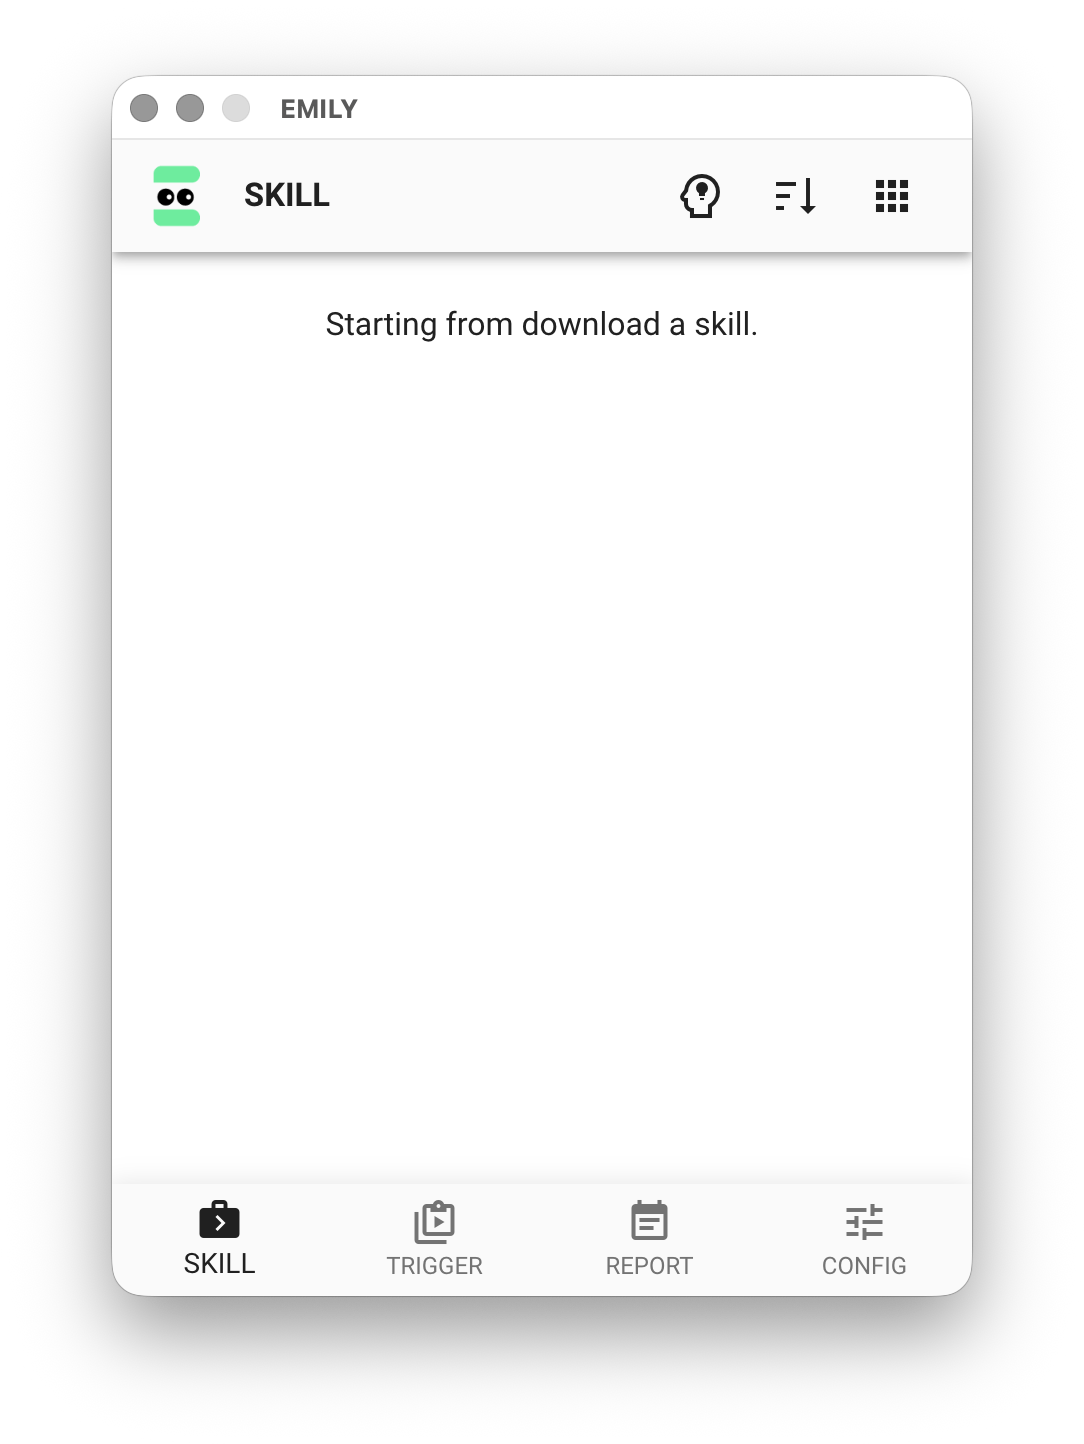
SKILL
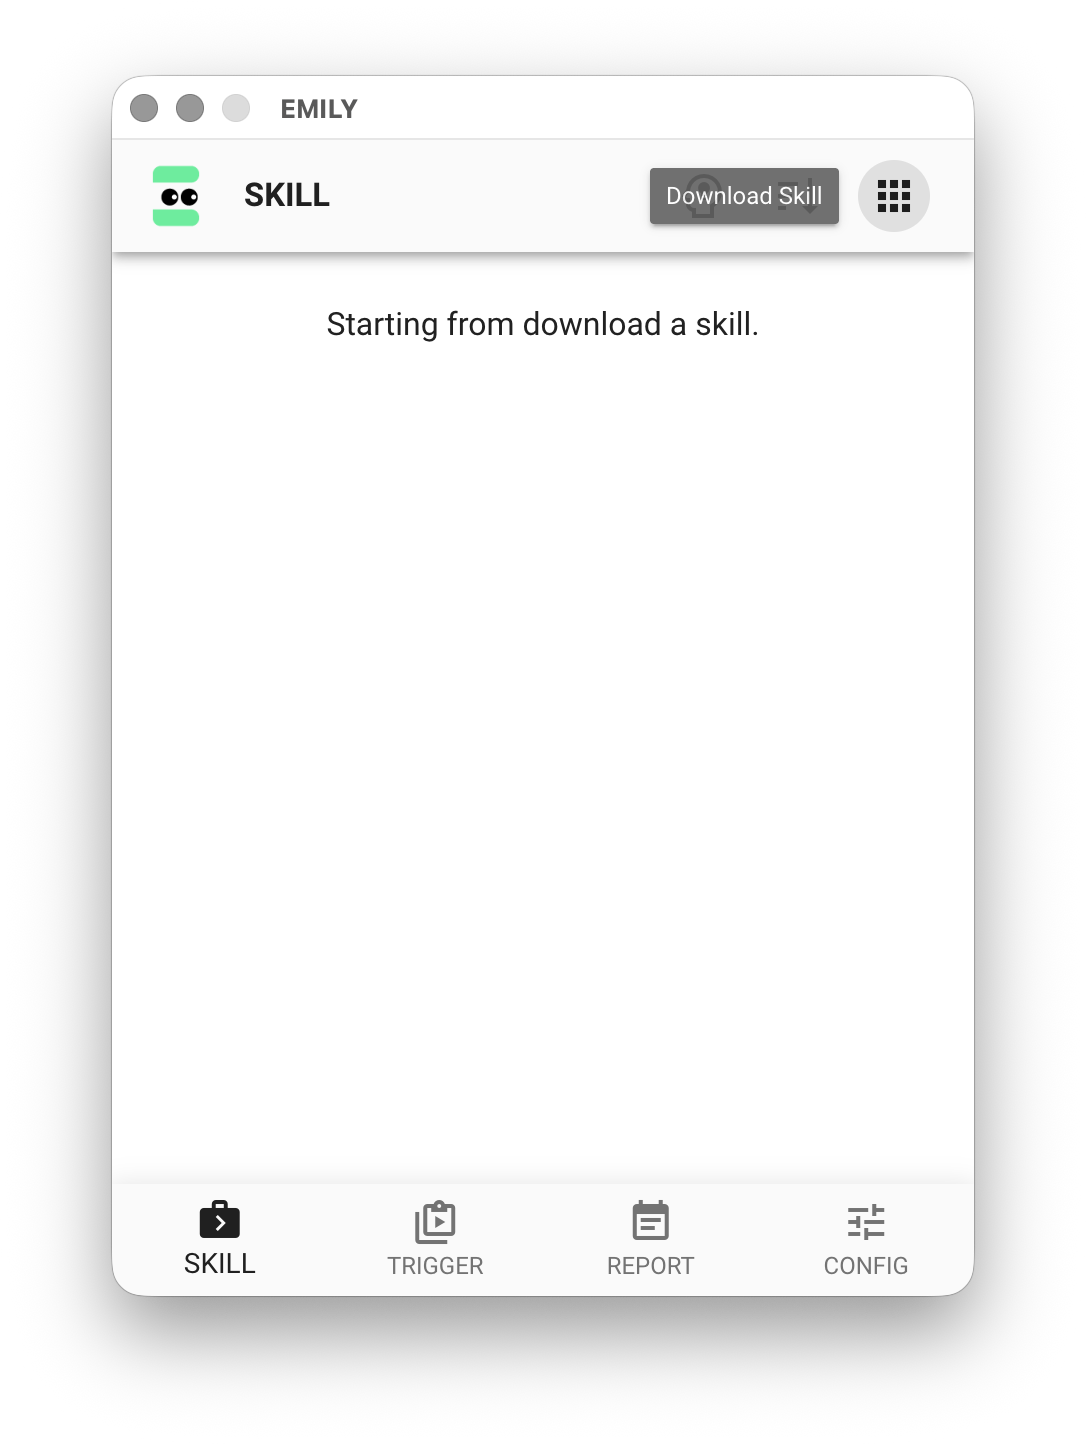
EMILY.RPA refers to "automation workflows" as "Skills", and the "SKILL" page is where you manage all skills on your local machine. Clicking the "Create Skill" icon in the header enters Training Mode; press ESC or click outside the dialog to cancel. In the "Training Mode Settings", you can name the Skill Group that a skill belongs to — a blank name is also a valid group. Skills in the same group share the same browser cookie database, which is useful for websites that require login, as these sites typically write login state to cookies to maintain the session. Each time a skill is executed in EMILY.RPA, a corresponding "Working Folder" is assigned. During Training Mode, the Working Folder is fixed to a folder named tmp — this simplifies managing and reusing input/output files while developing skills. The Reset Workspace option deletes all files in the tmp folder. However, in Execution Mode, each skill run generates its own dedicated Working Folder to isolate results from different runs and allow users to trace back and access the input/output files of each execution.
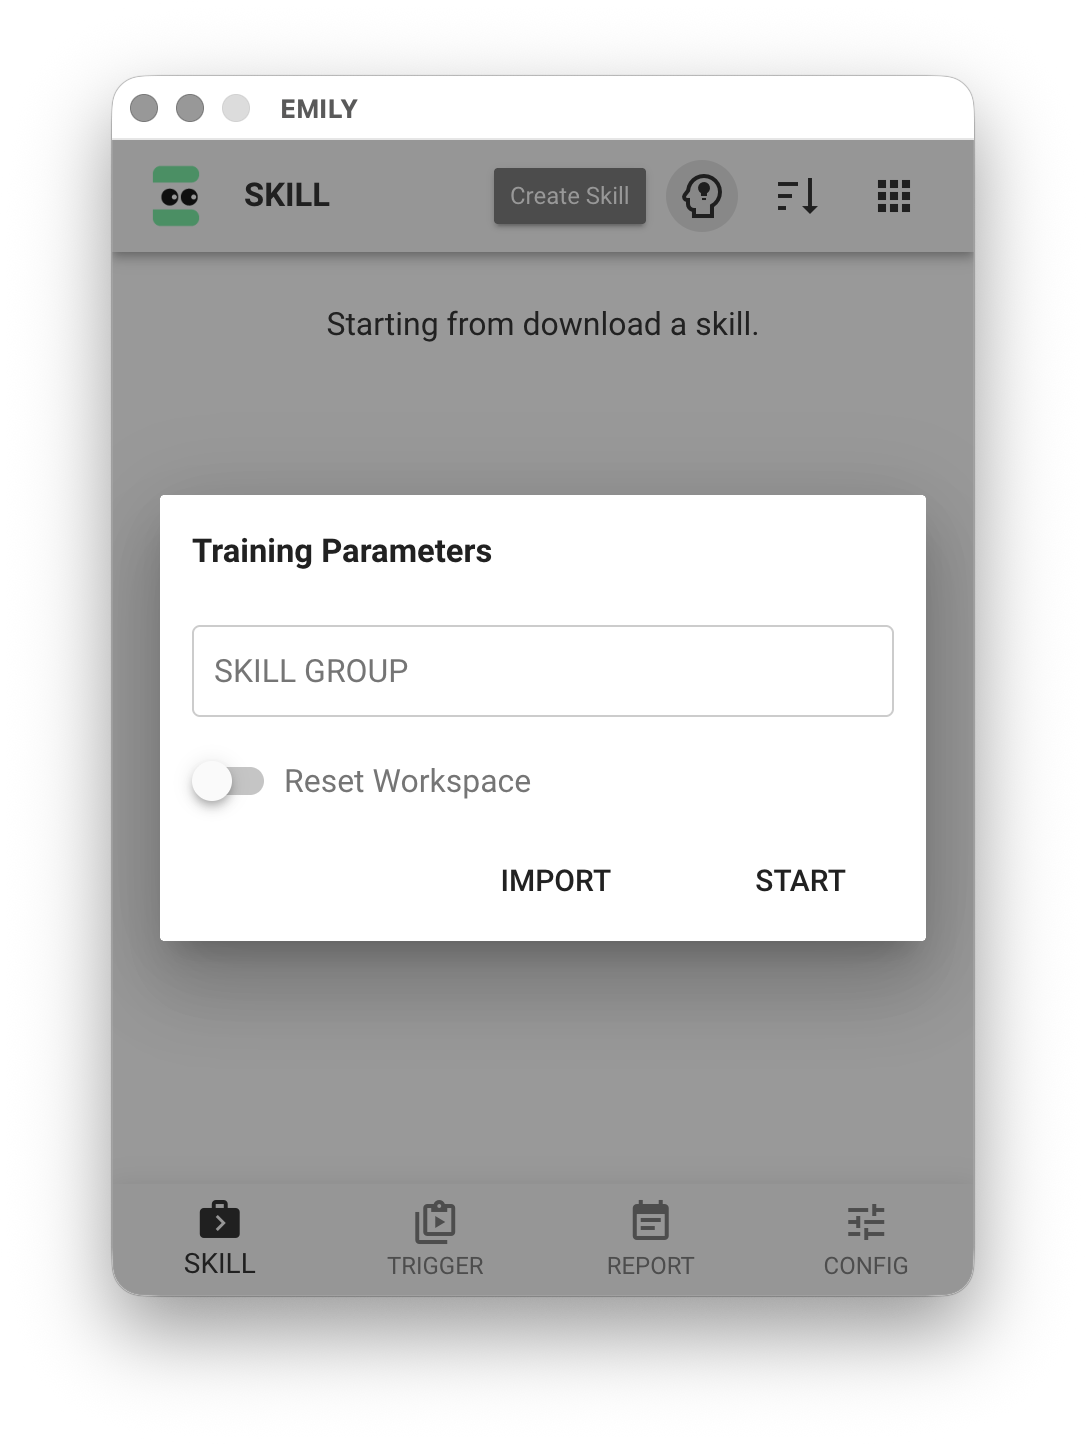
After completing the "Training Parameters", a training browser window opens. You can enter the target webpage URL in the address bar to begin designing a web automation workflow, or select an automation module below. At this point, the main interface switches to functions for adding, editing, and deleting workflow steps.
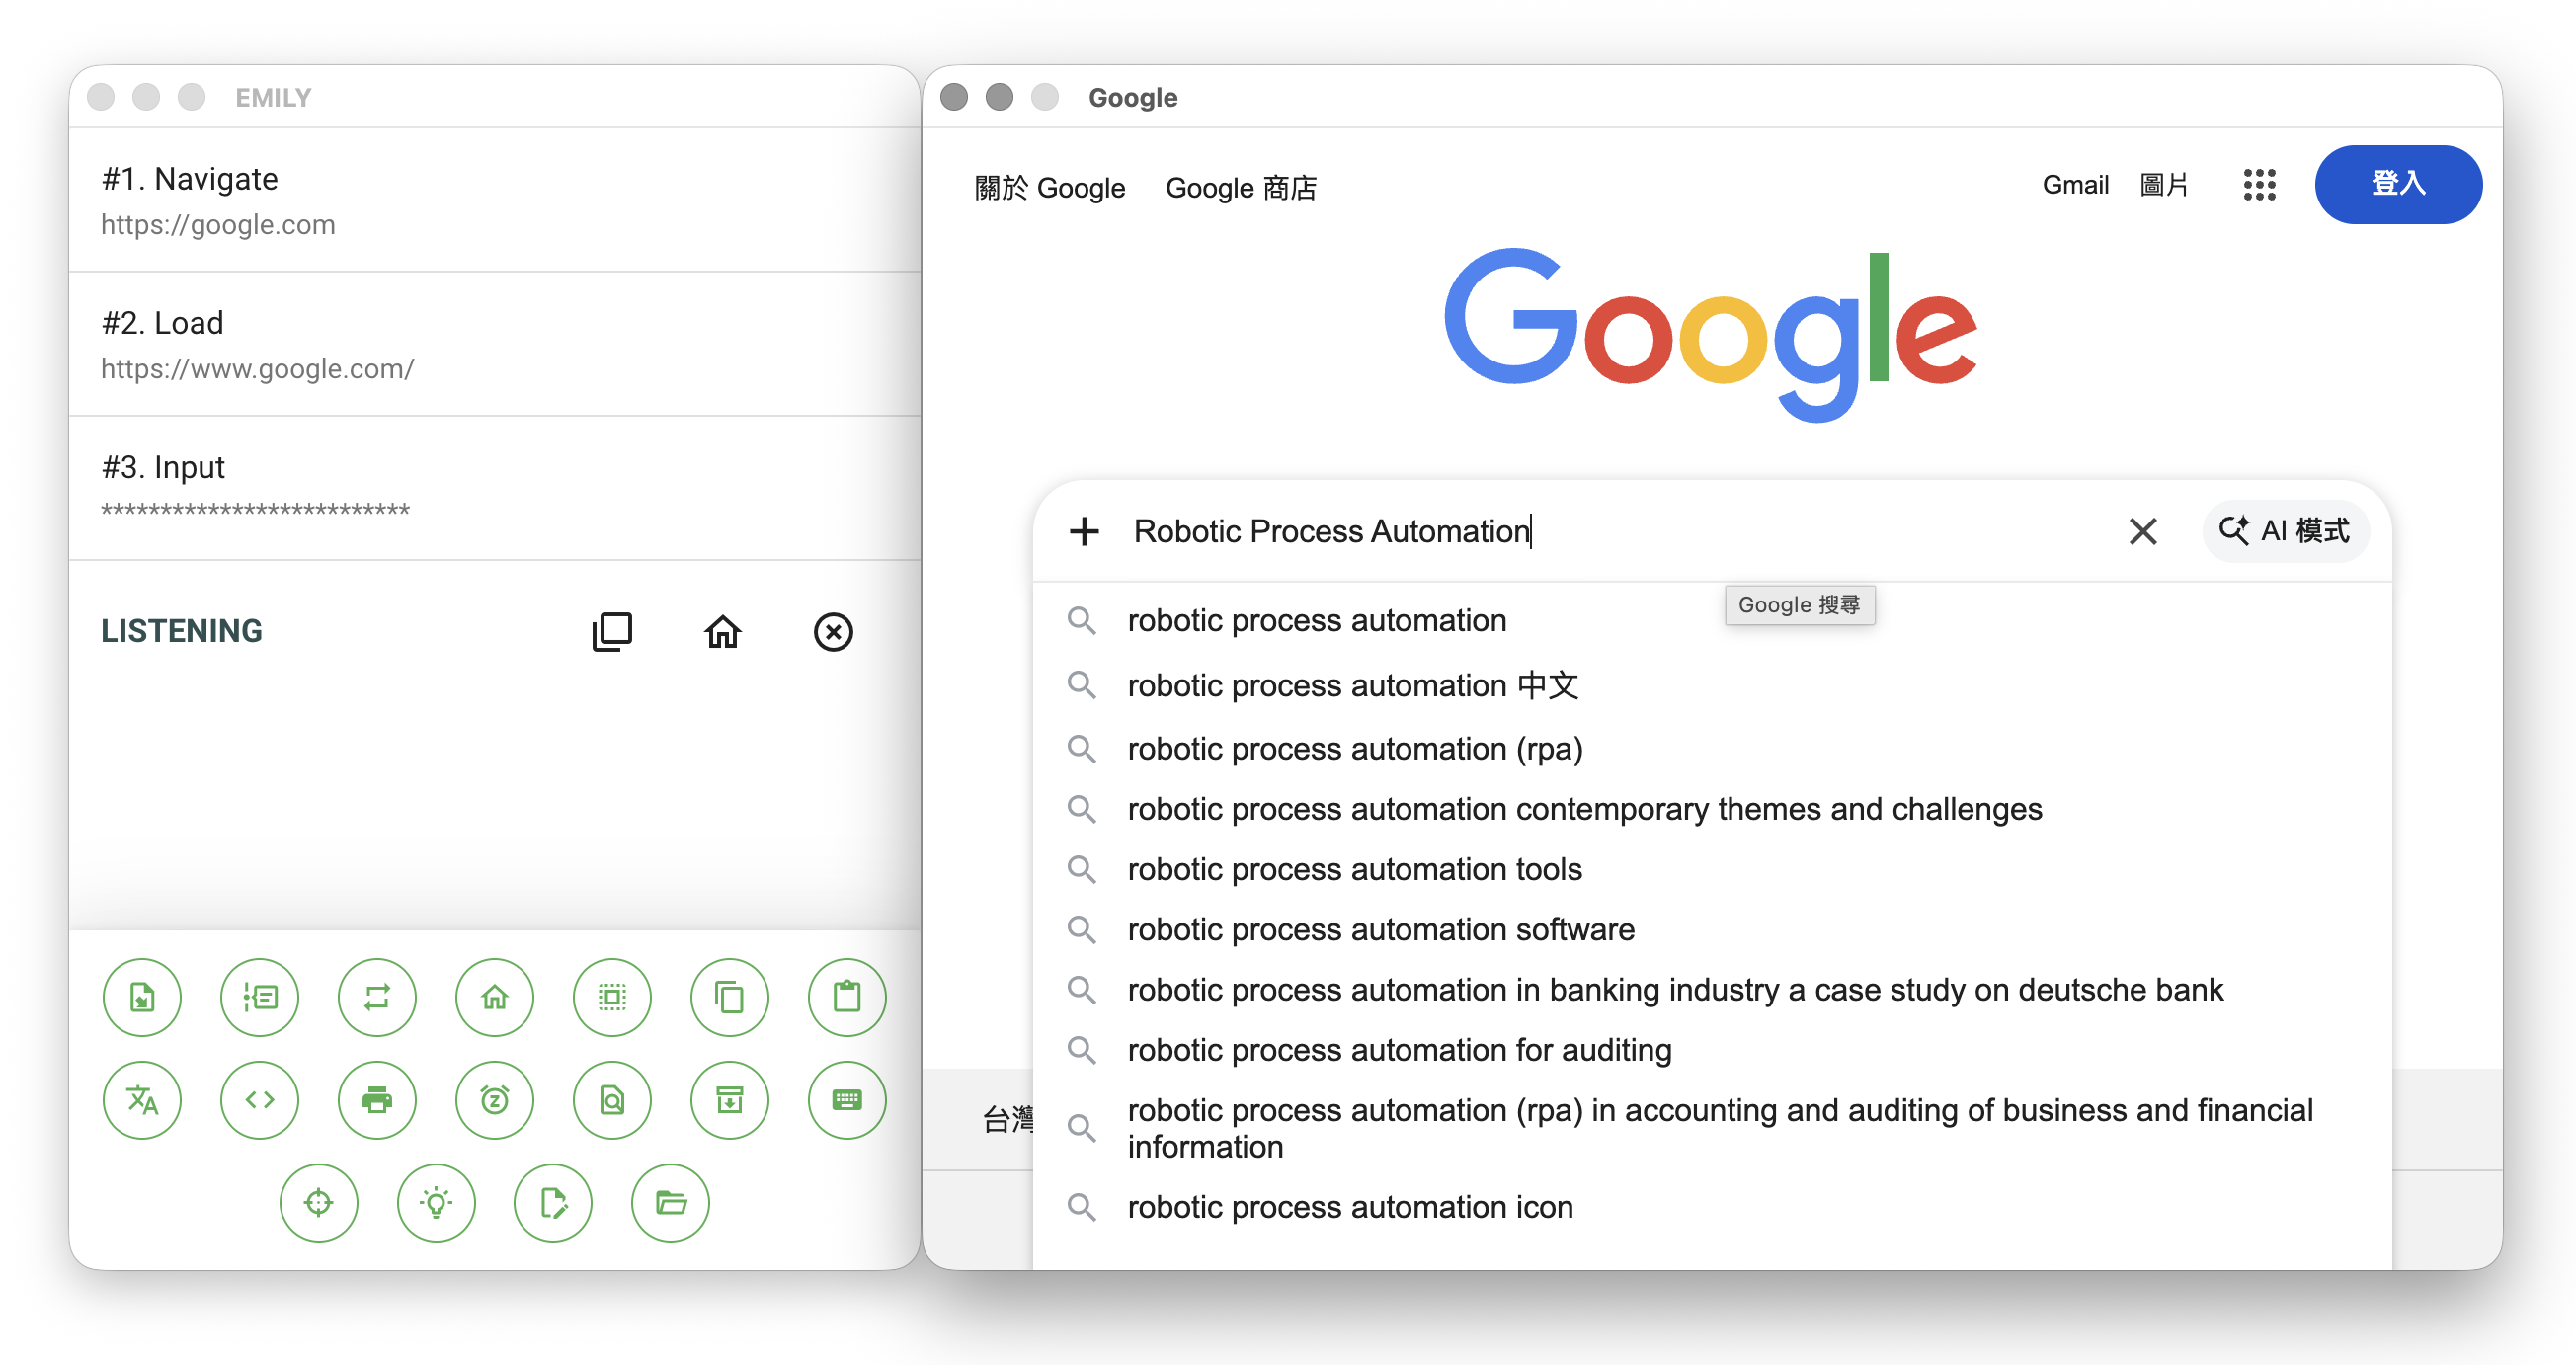
Web Automation training screen
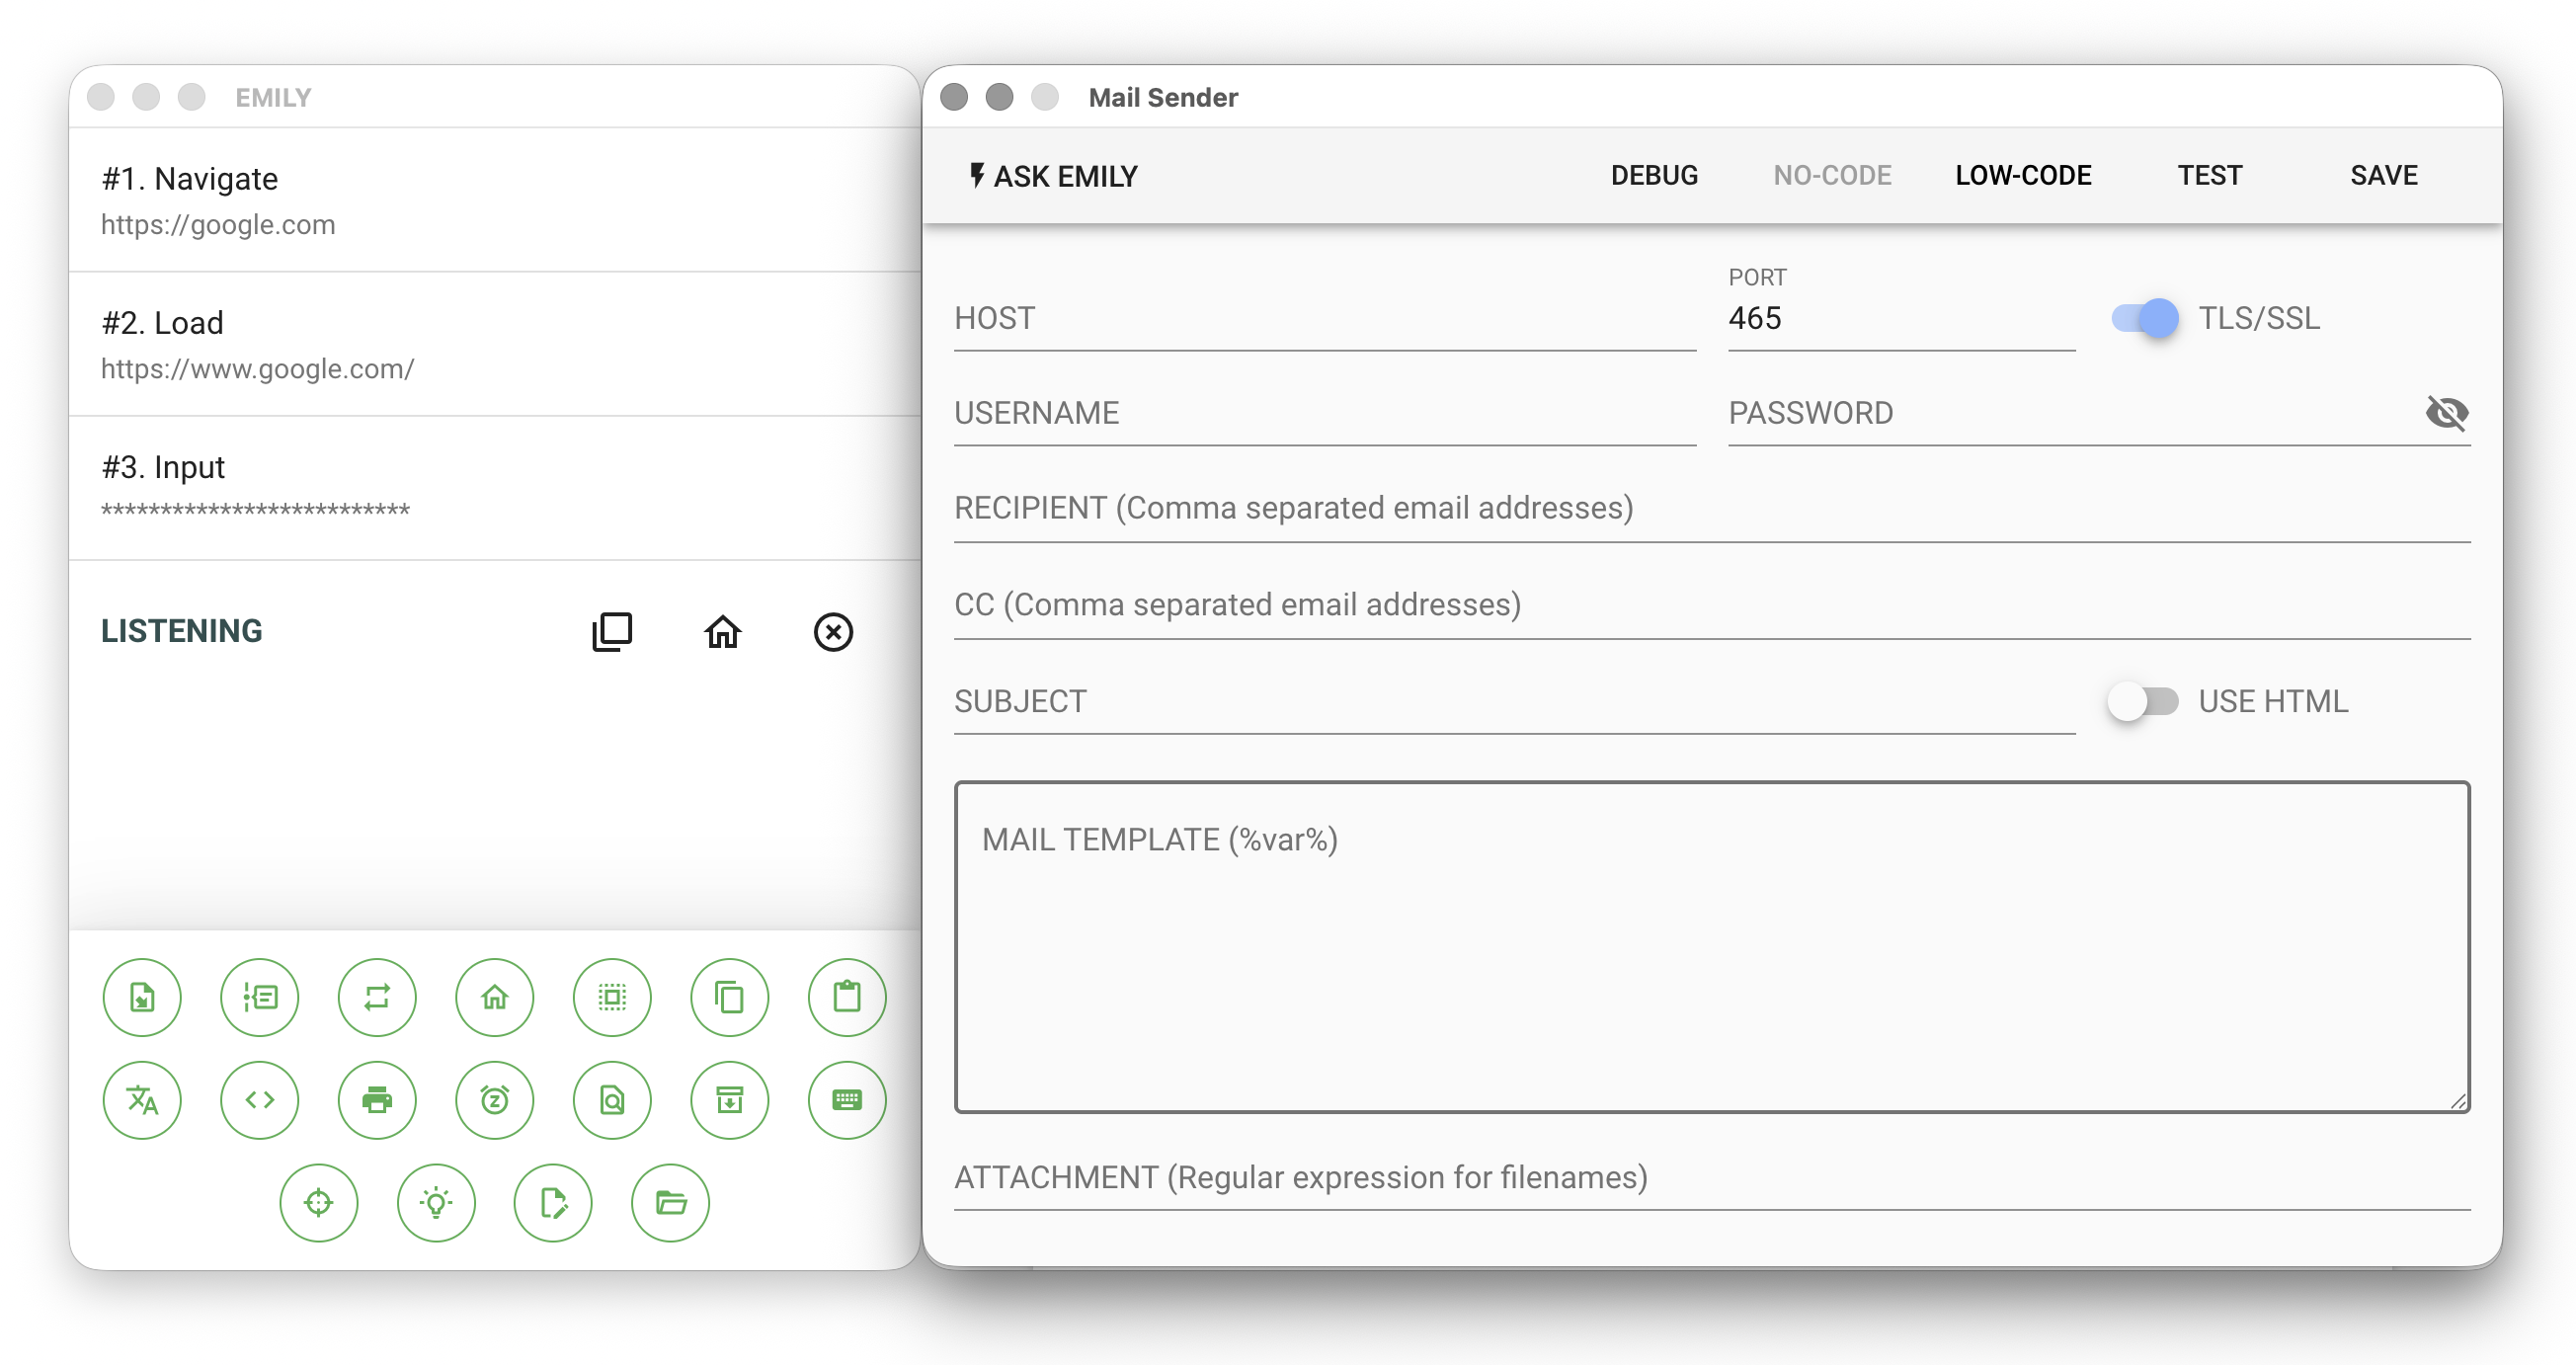
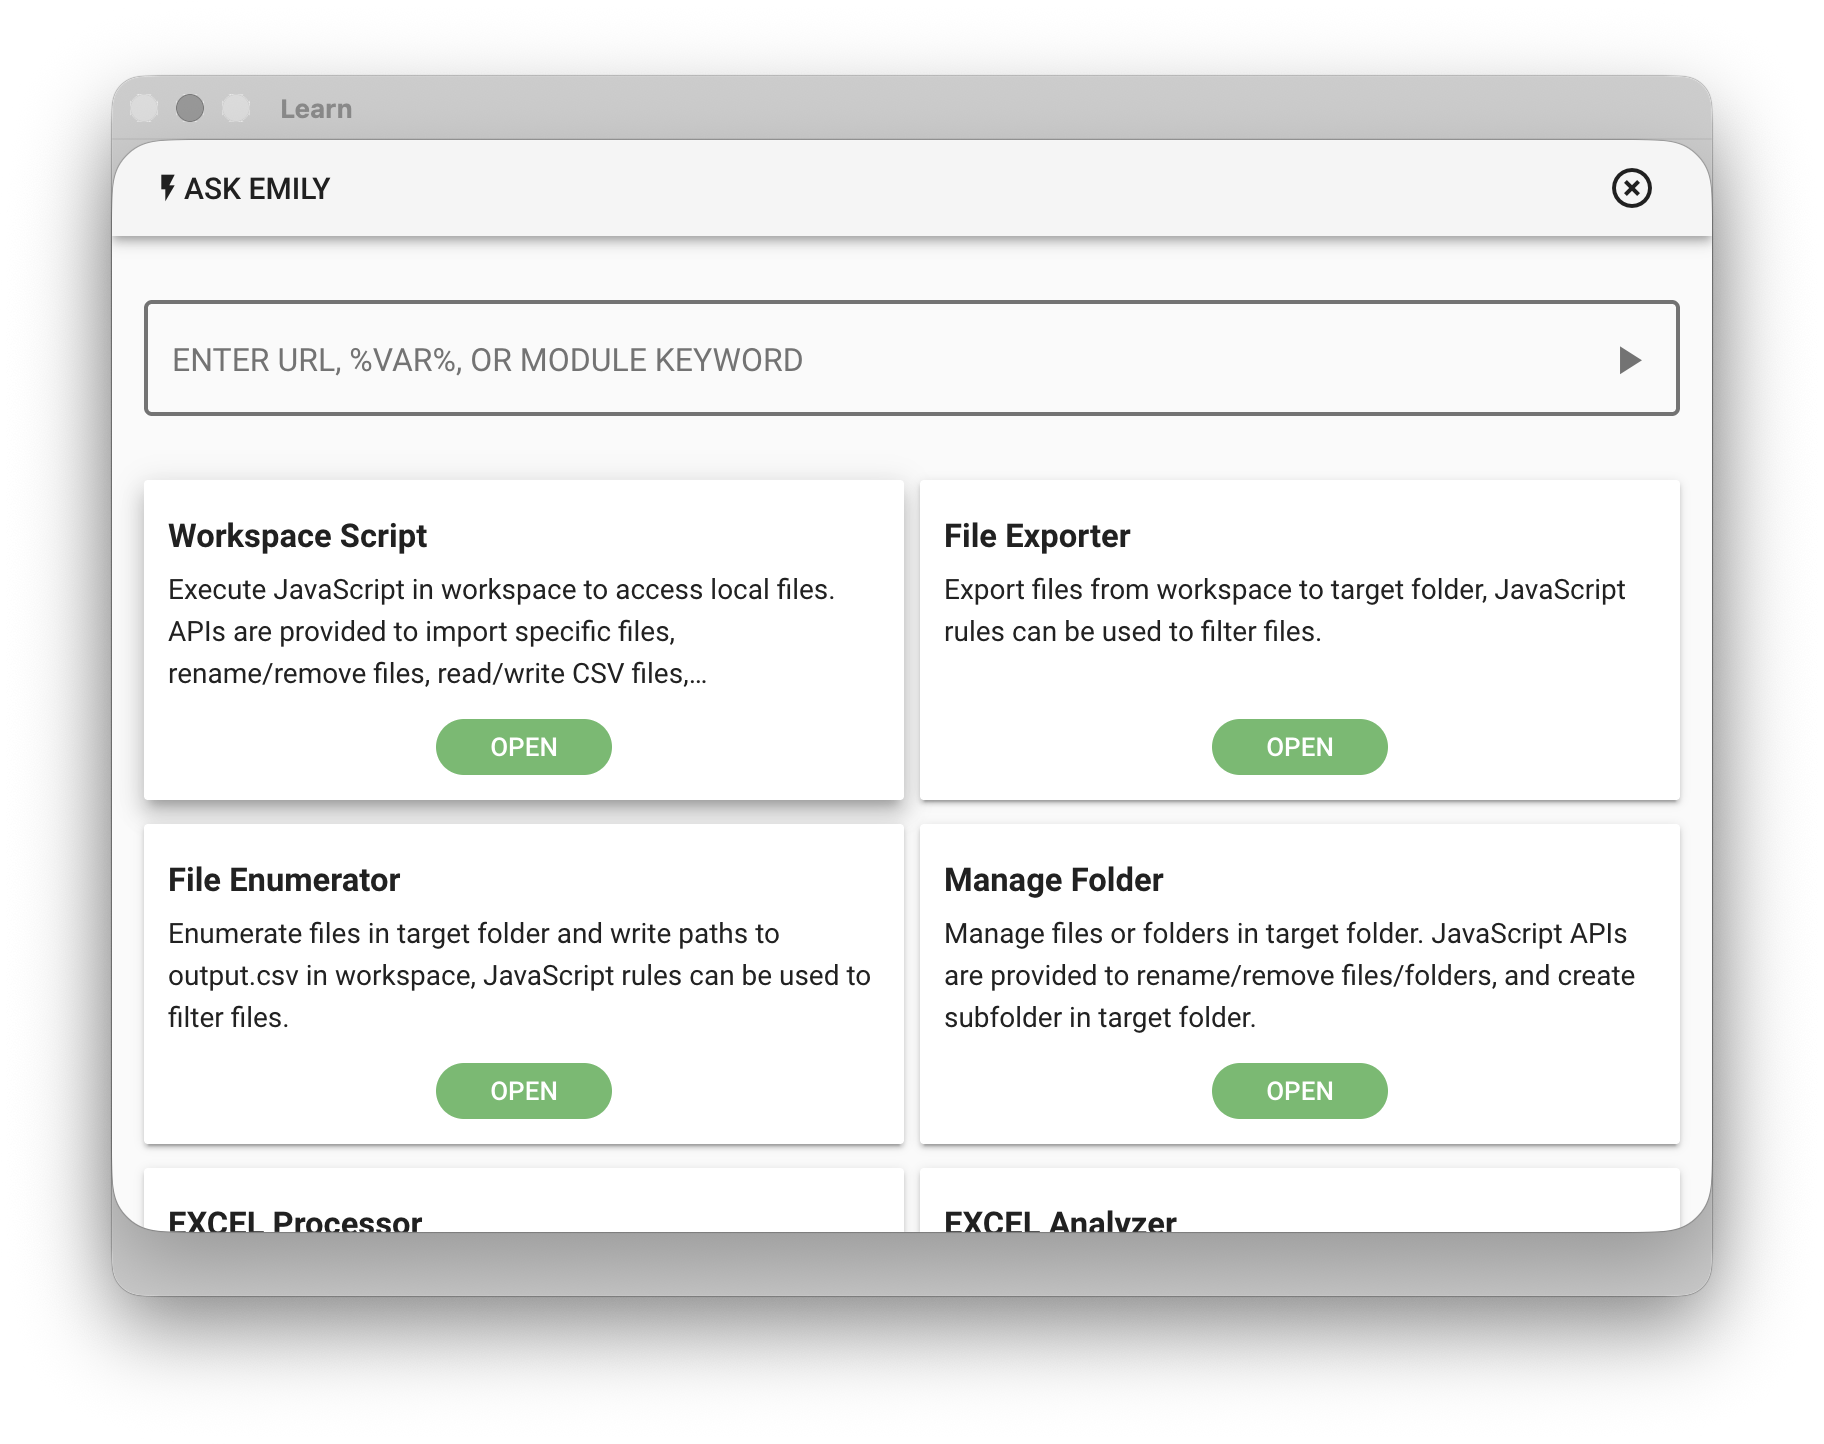
Automation module training screen
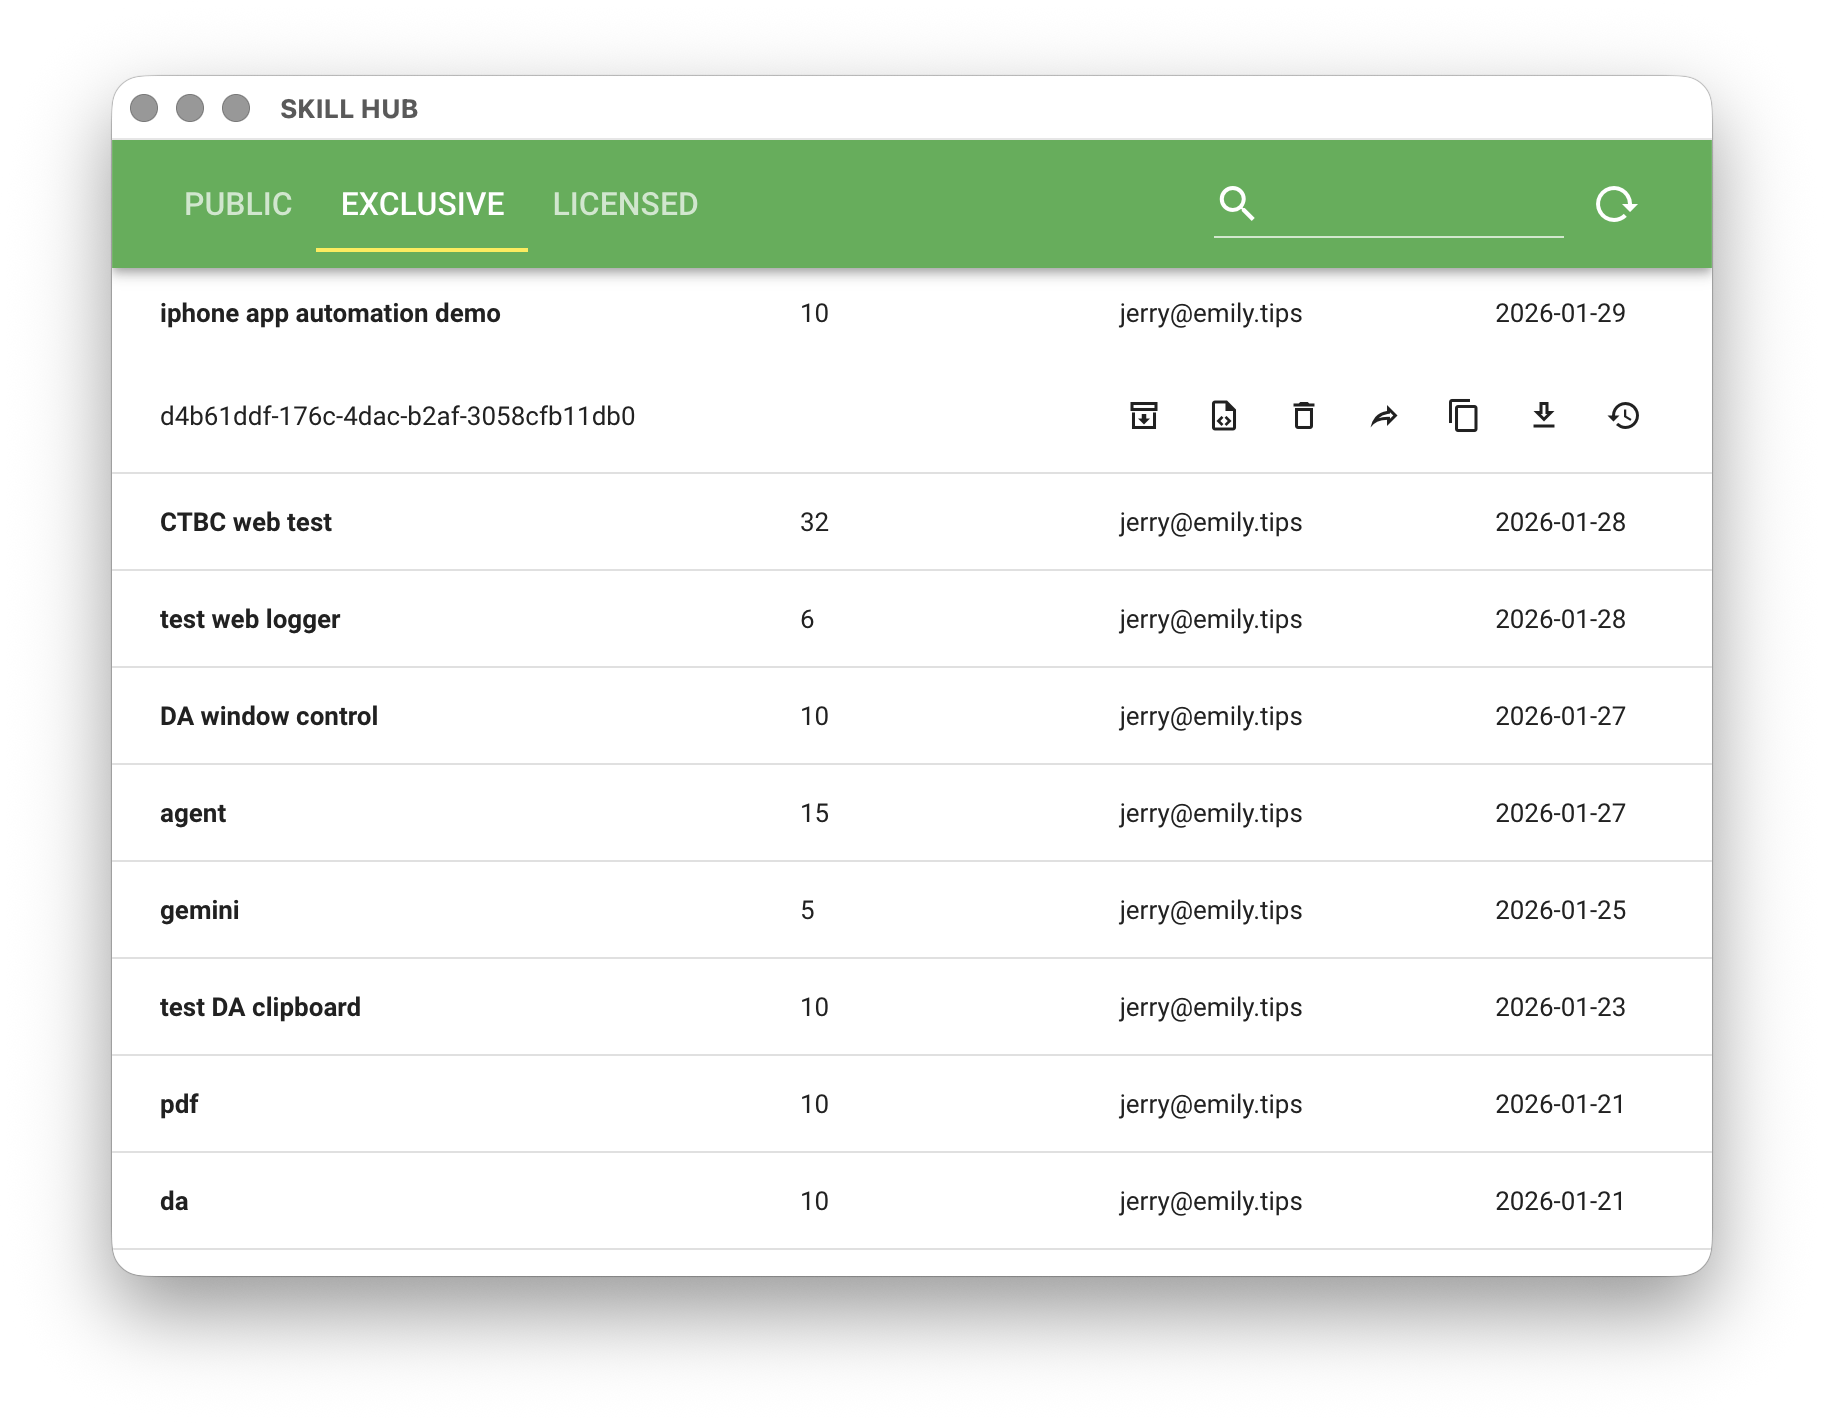
The "Download Skill" icon in the "SKILL" header is the entry point to the Skill Hub. The Skill Hub stores all skills developed by the user, as well as skills shared by other users in the enterprise group. Skills deleted locally can be re-downloaded and reinstalled from the Skill Hub. If you have subscribed to an enterprise group, each skill upload is added to the version history, enabling version control.
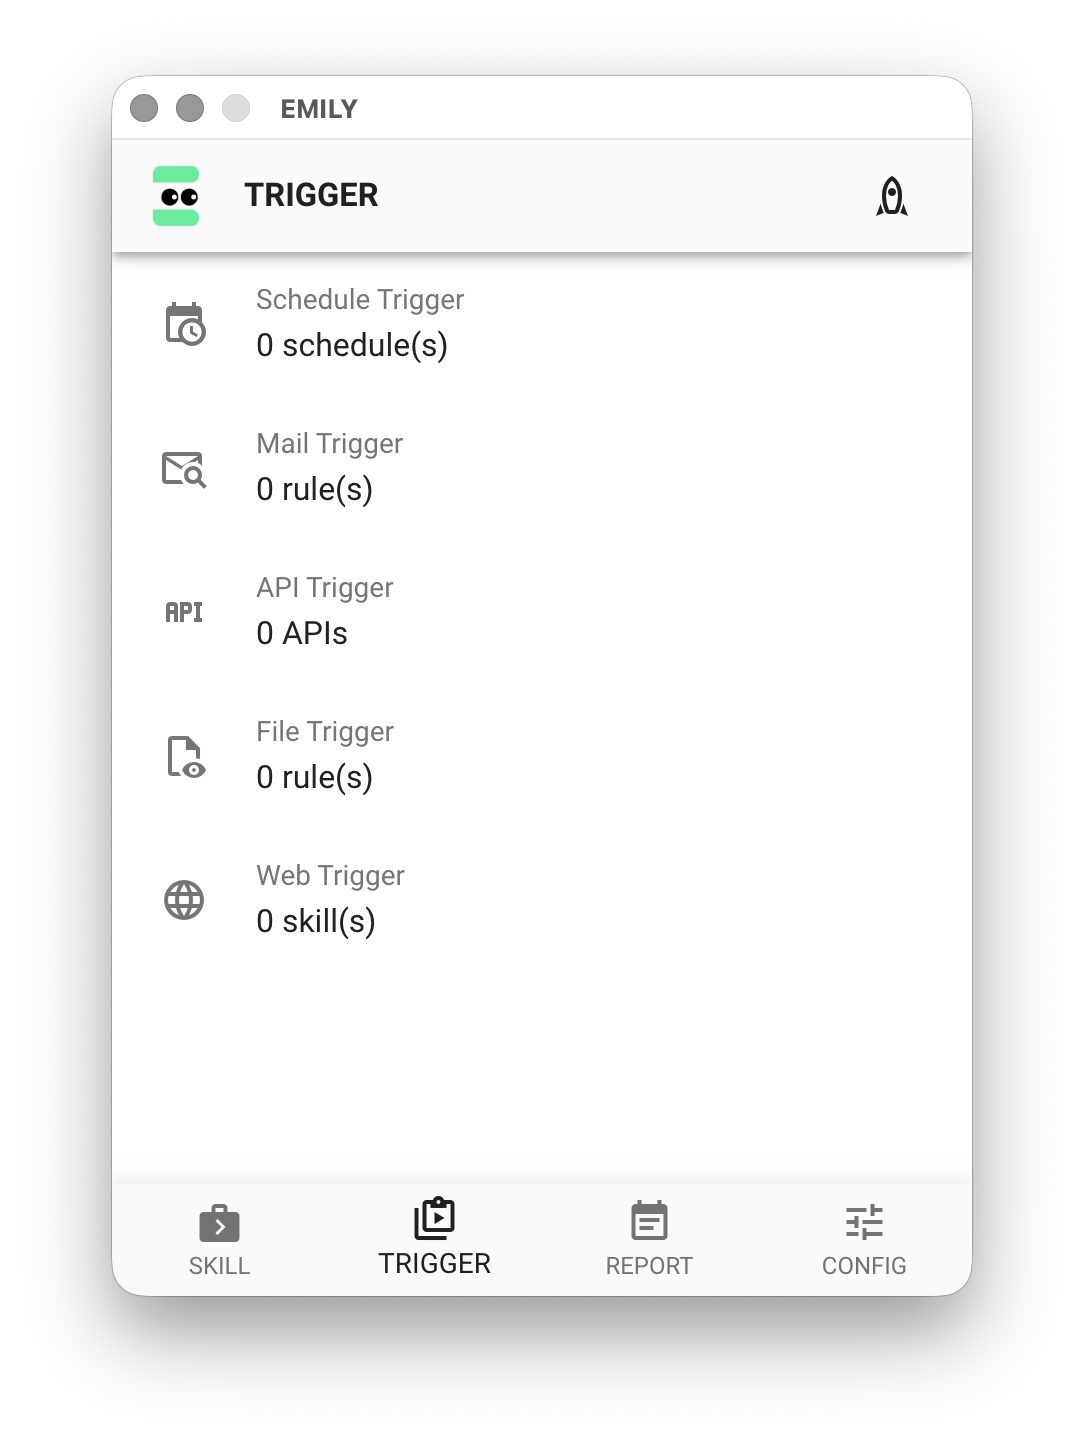
TRIGGER
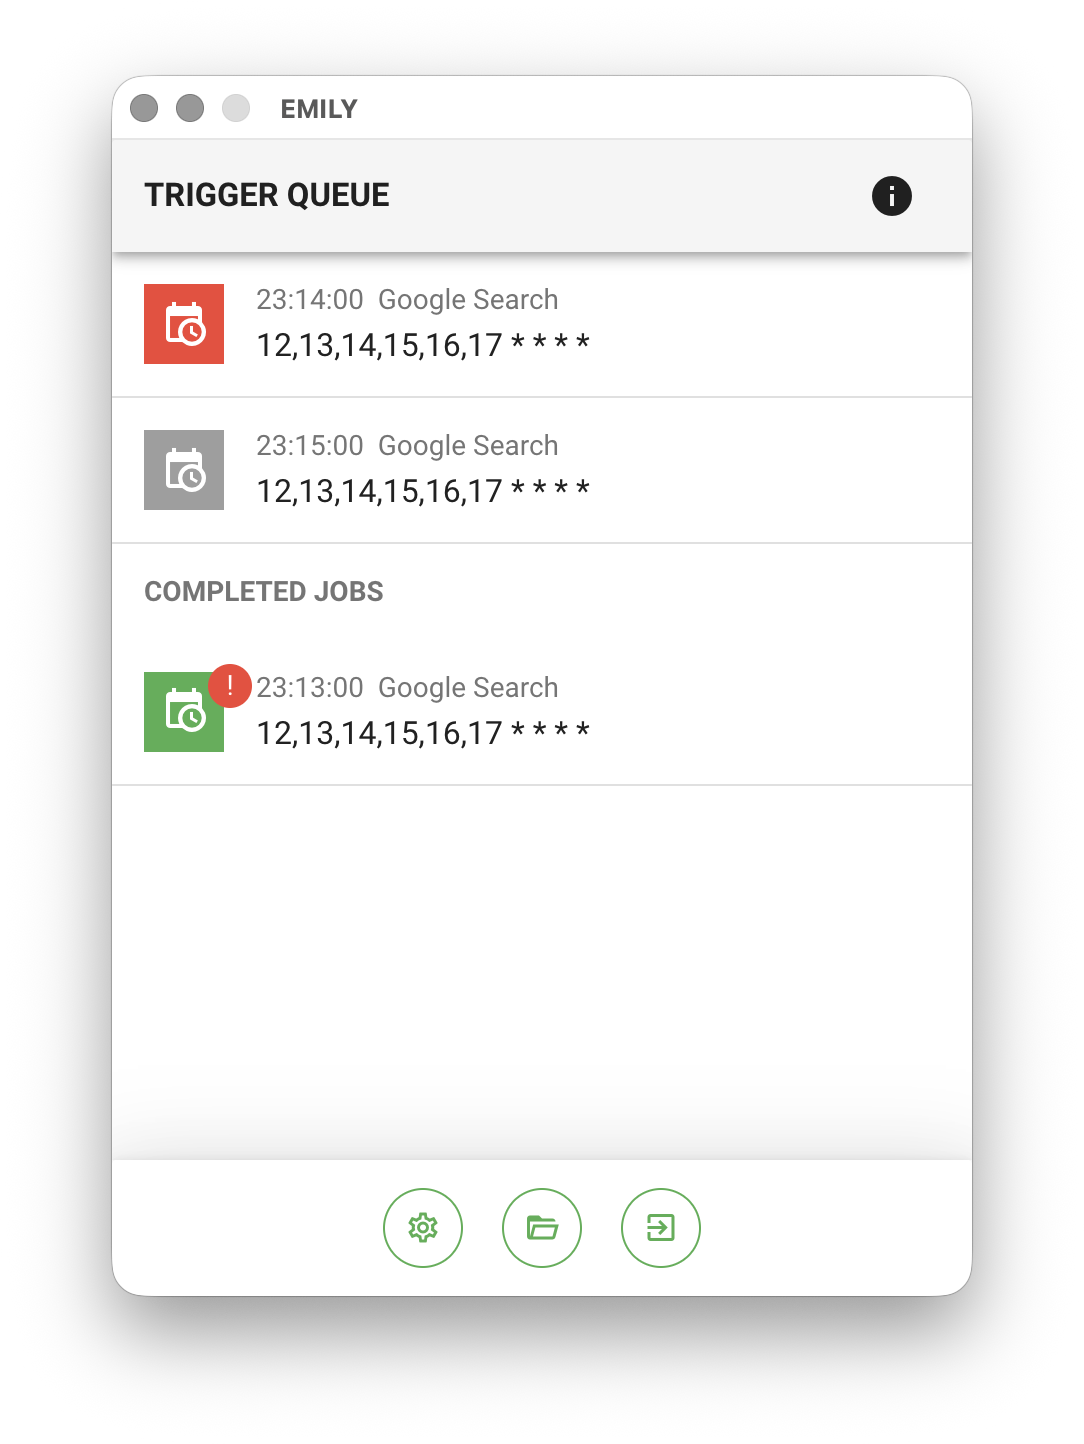
The "TRIGGER" page includes configuration and management for "Schedule Trigger", "Email Trigger", "API Trigger", "File Trigger", and "Web Trigger". After completing the setup, you must click "Start Triggers" for EMILY.RPA to enter fully automated mode — only then will the triggers become active.
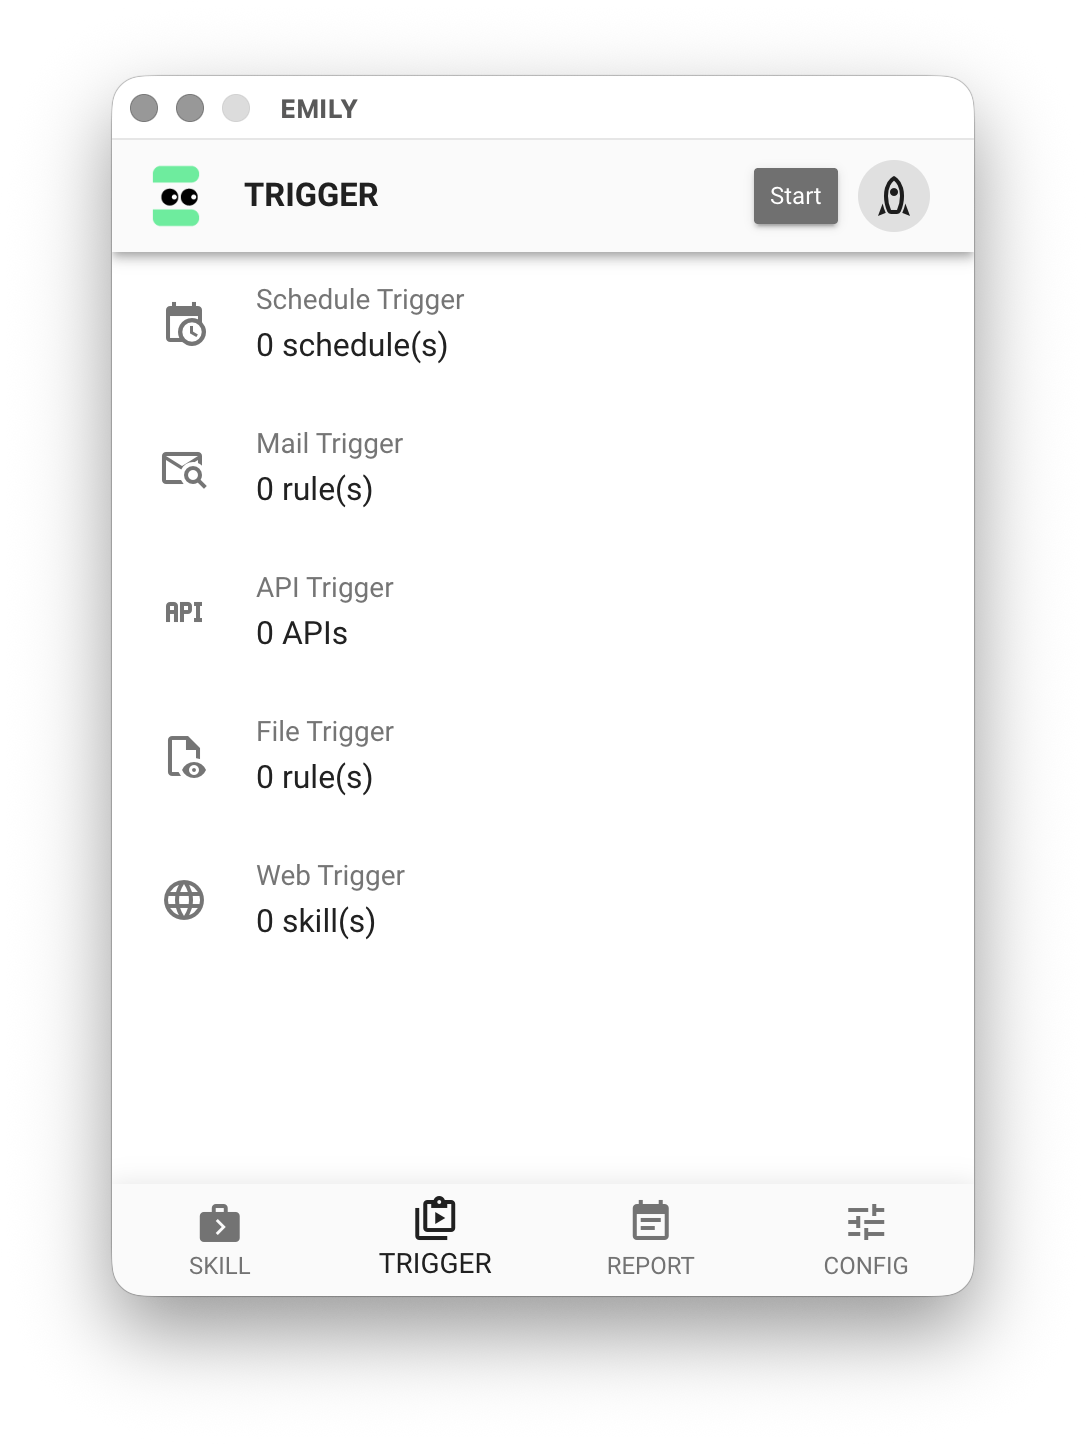
Once in fully automated mode, all skills that meet the trigger conditions are queued and executed sequentially — one job at a time. Other EMILY.RPA functions are unavailable until you exit fully automated mode, ensuring stability. For example, modifying trigger rules or entering Training Mode requires exiting fully automated mode first.
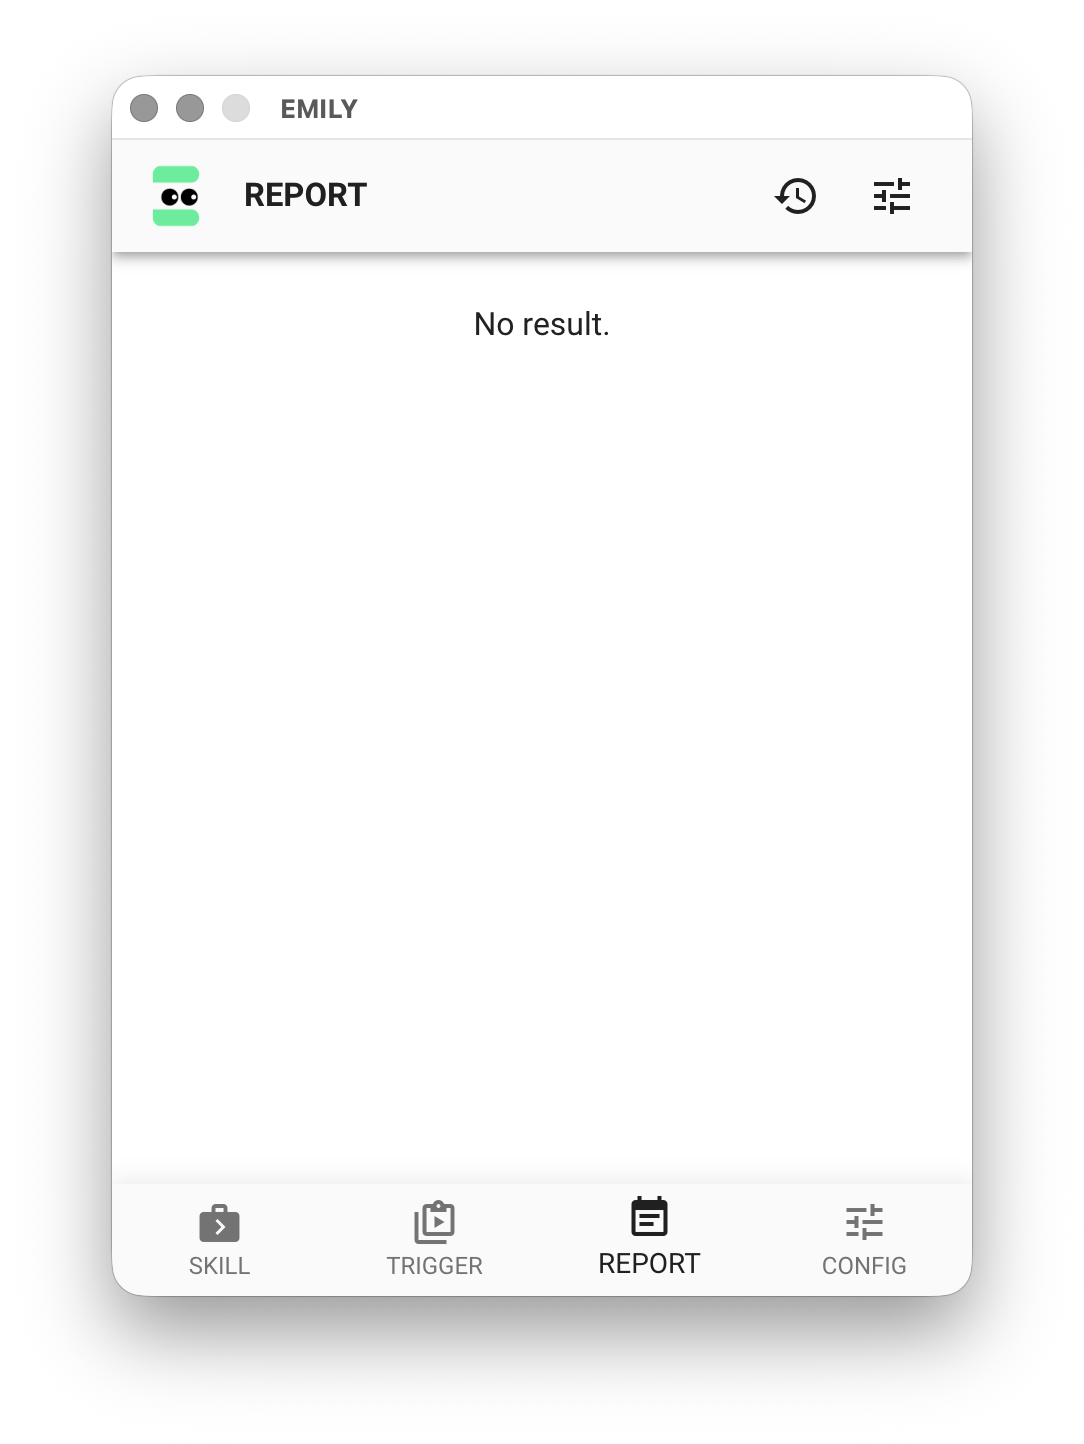
REPORT
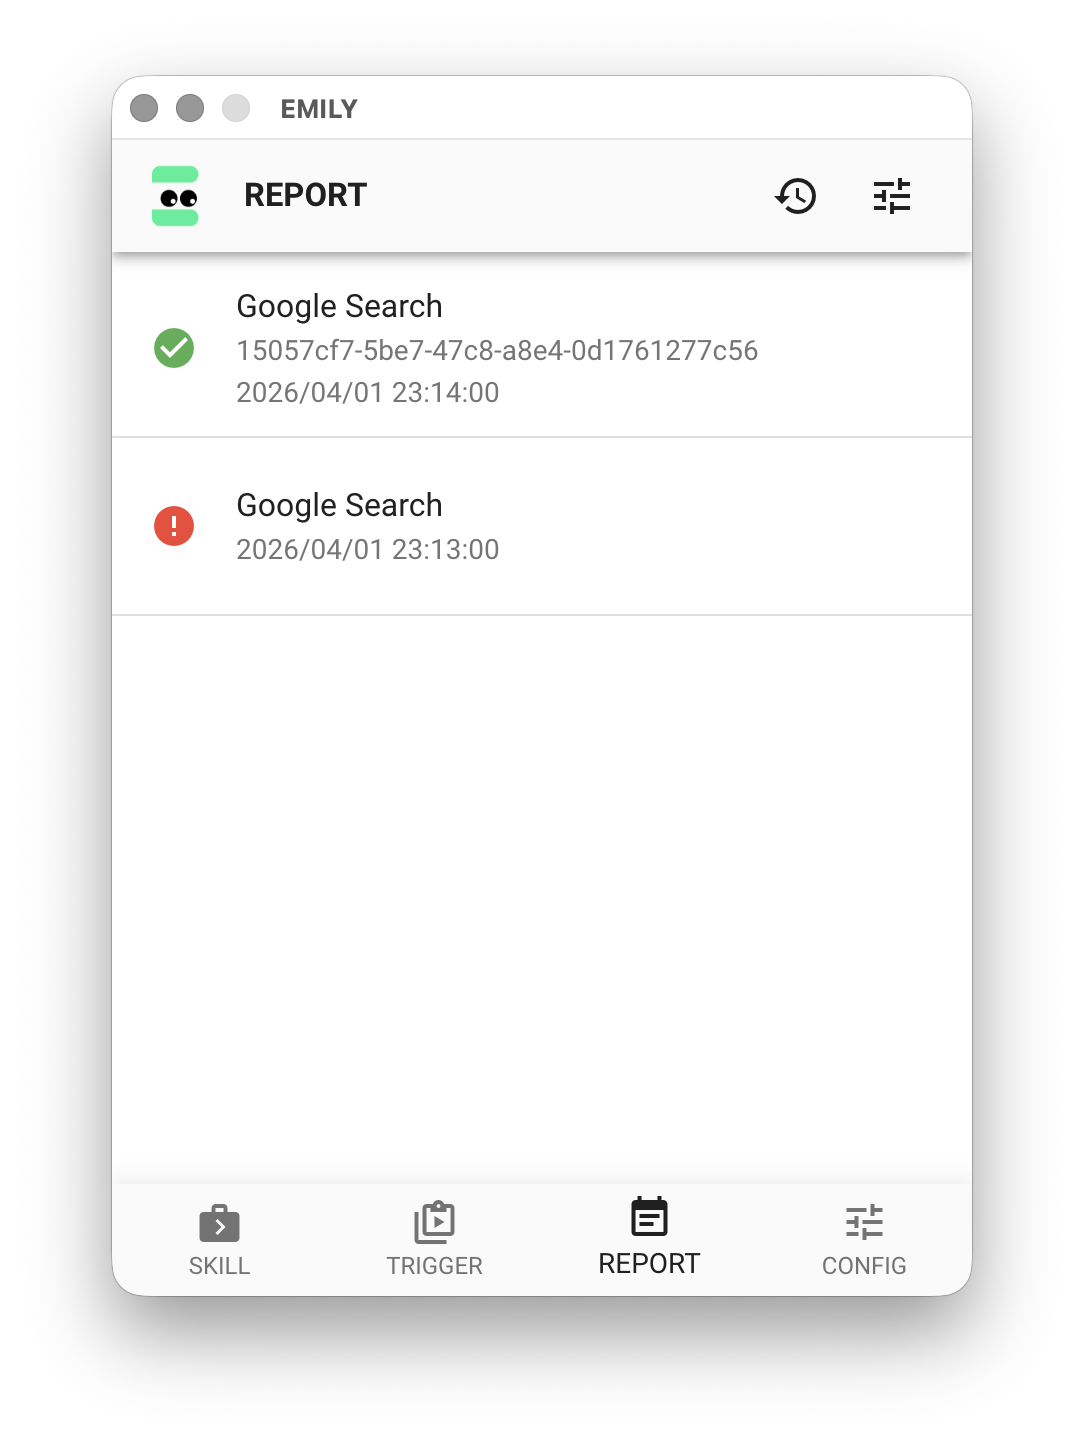
This page stores the result information after skill execution, including the Working Folder for each skill run. The header provides settings for "Notification Frequency" and "Result Retention Period".
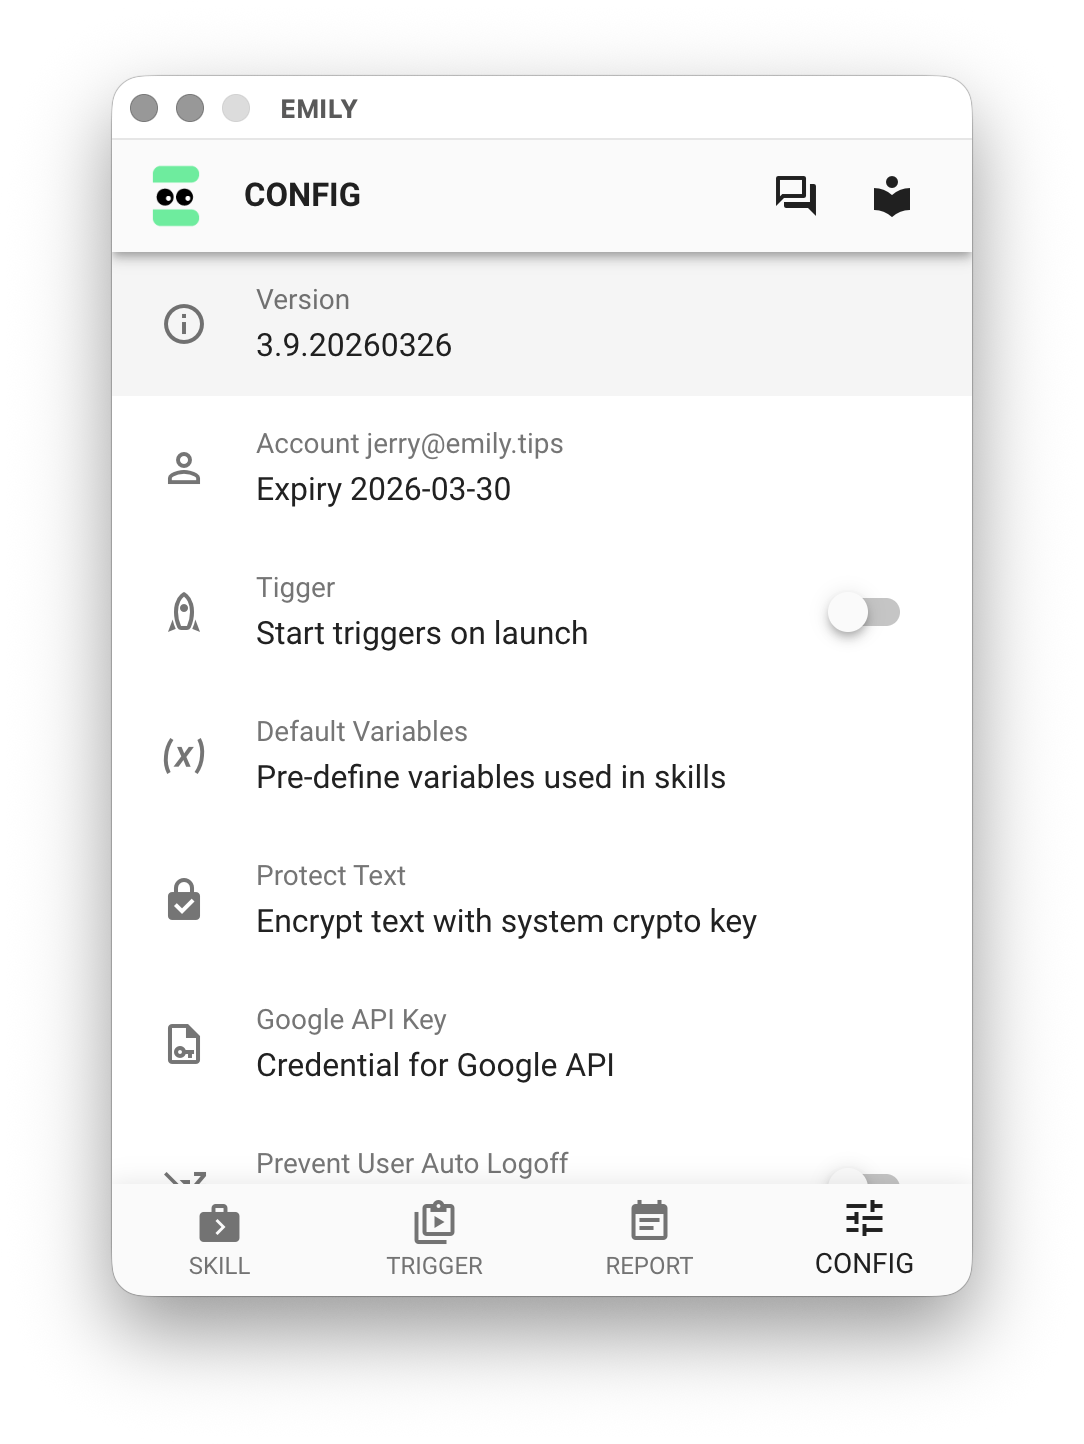
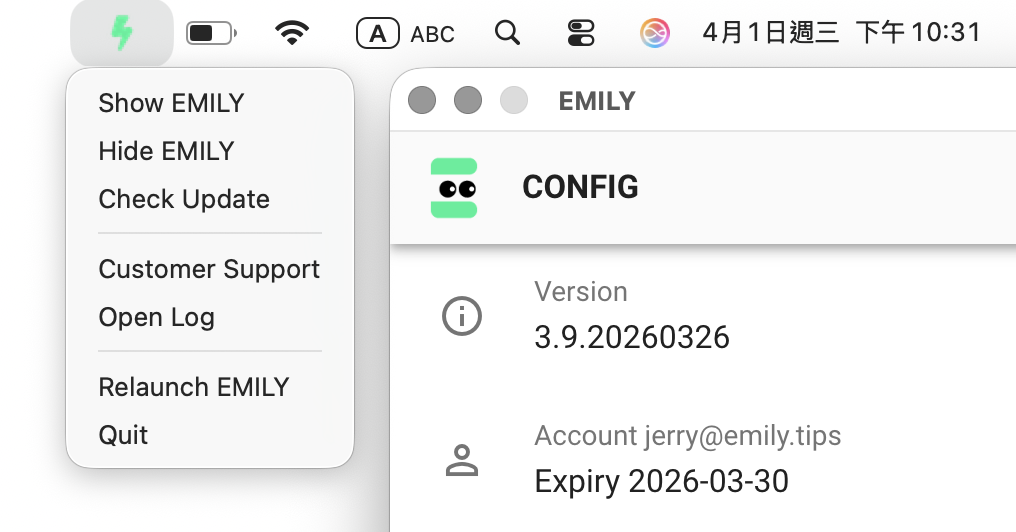
CONFIG
On the "CONFIG" page, the Version Info section provides options for version updates and user interface language settings. The Account Details section shows account and license information, and offers the ability to purchase licenses online. Additional options include configuring Google Cloud application credentials, defining variables, encrypting text data, and more.
