Design Your First Skill
Now let's design a simple skill hands-on. First, we'll go to the Wikipedia website at https://www.wikipedia.org/ to search for the keyword world wide web, then save the search results as a PDF file, and finally place it on the desktop. This skill will use web automation to operate the EMILY.RPA browser, as well as an automation module to copy the file to the desktop. Through this exercise, you'll quickly understand how the design mode works.
Enter Training Mode
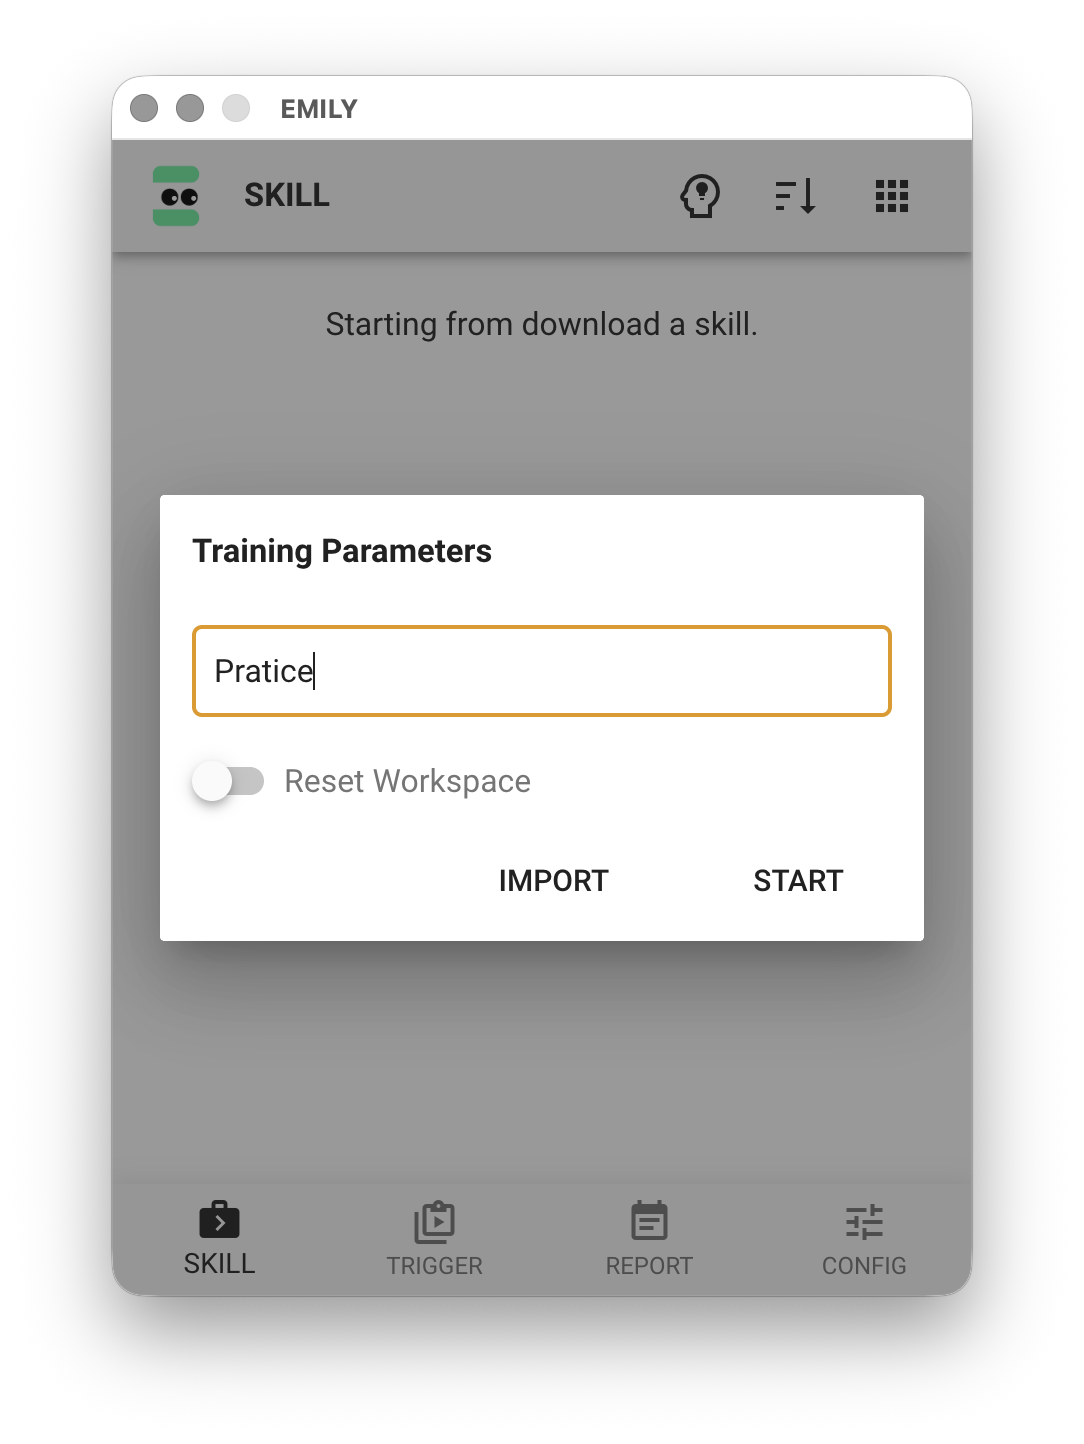
First, click the "Train Skill" icon at the top of the "My Skills" page. In the "Training Mode Settings" dialog, enter Practice Skills in the Skill Group field — this will categorize the skill we're about to create under the Practice Skills group. You don't need to check "Clear Working Folder" since the Training Mode working folder tmp should be empty at this point. Then click "Start".
Prepare for Web Automation
After entering "Training Mode", a browser window opens automatically. Enter https://www.wikipedia.org/ in the Web Automation address bar and press ENTER — the browser will load the Wikipedia homepage.
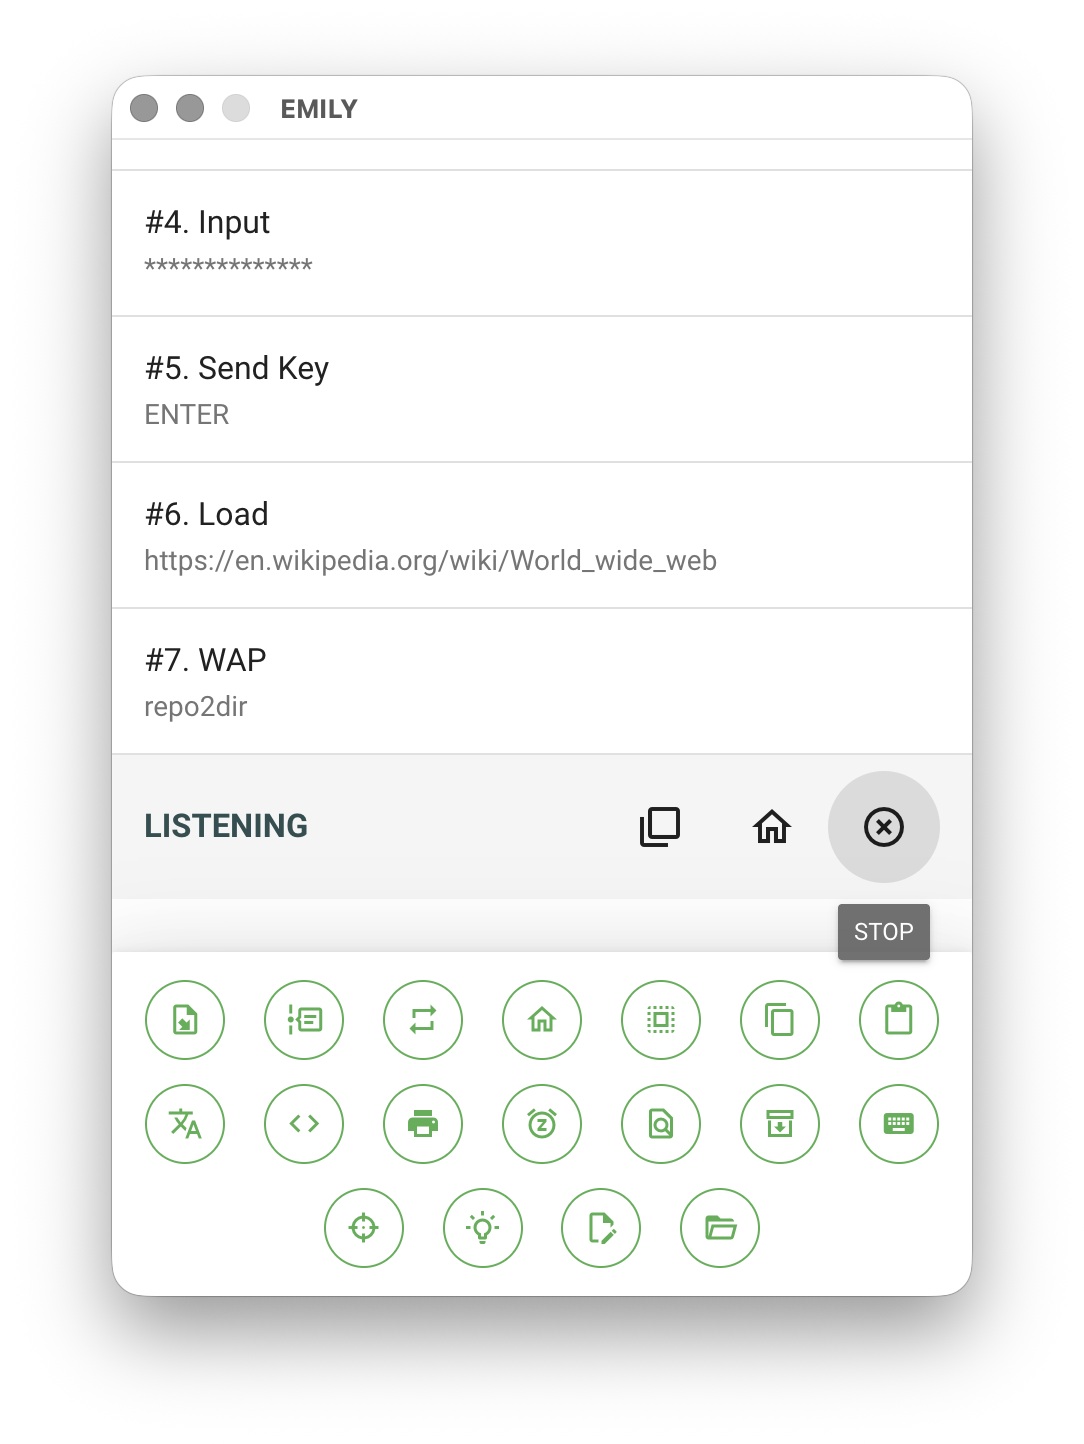
At this point, you should see the screen shown below. The upper half of the main window on the left displays the command list, the lower half shows various tool icons, and the browser window displays the Wikipedia homepage.

Record Web Interaction Steps
Now let's interact with the webpage and let EMILY.RPA record every step of the interaction. Make sure the keyboard cursor is in the webpage's search box. If it isn't, click the center of the search box to place the cursor there, then type world wide web.
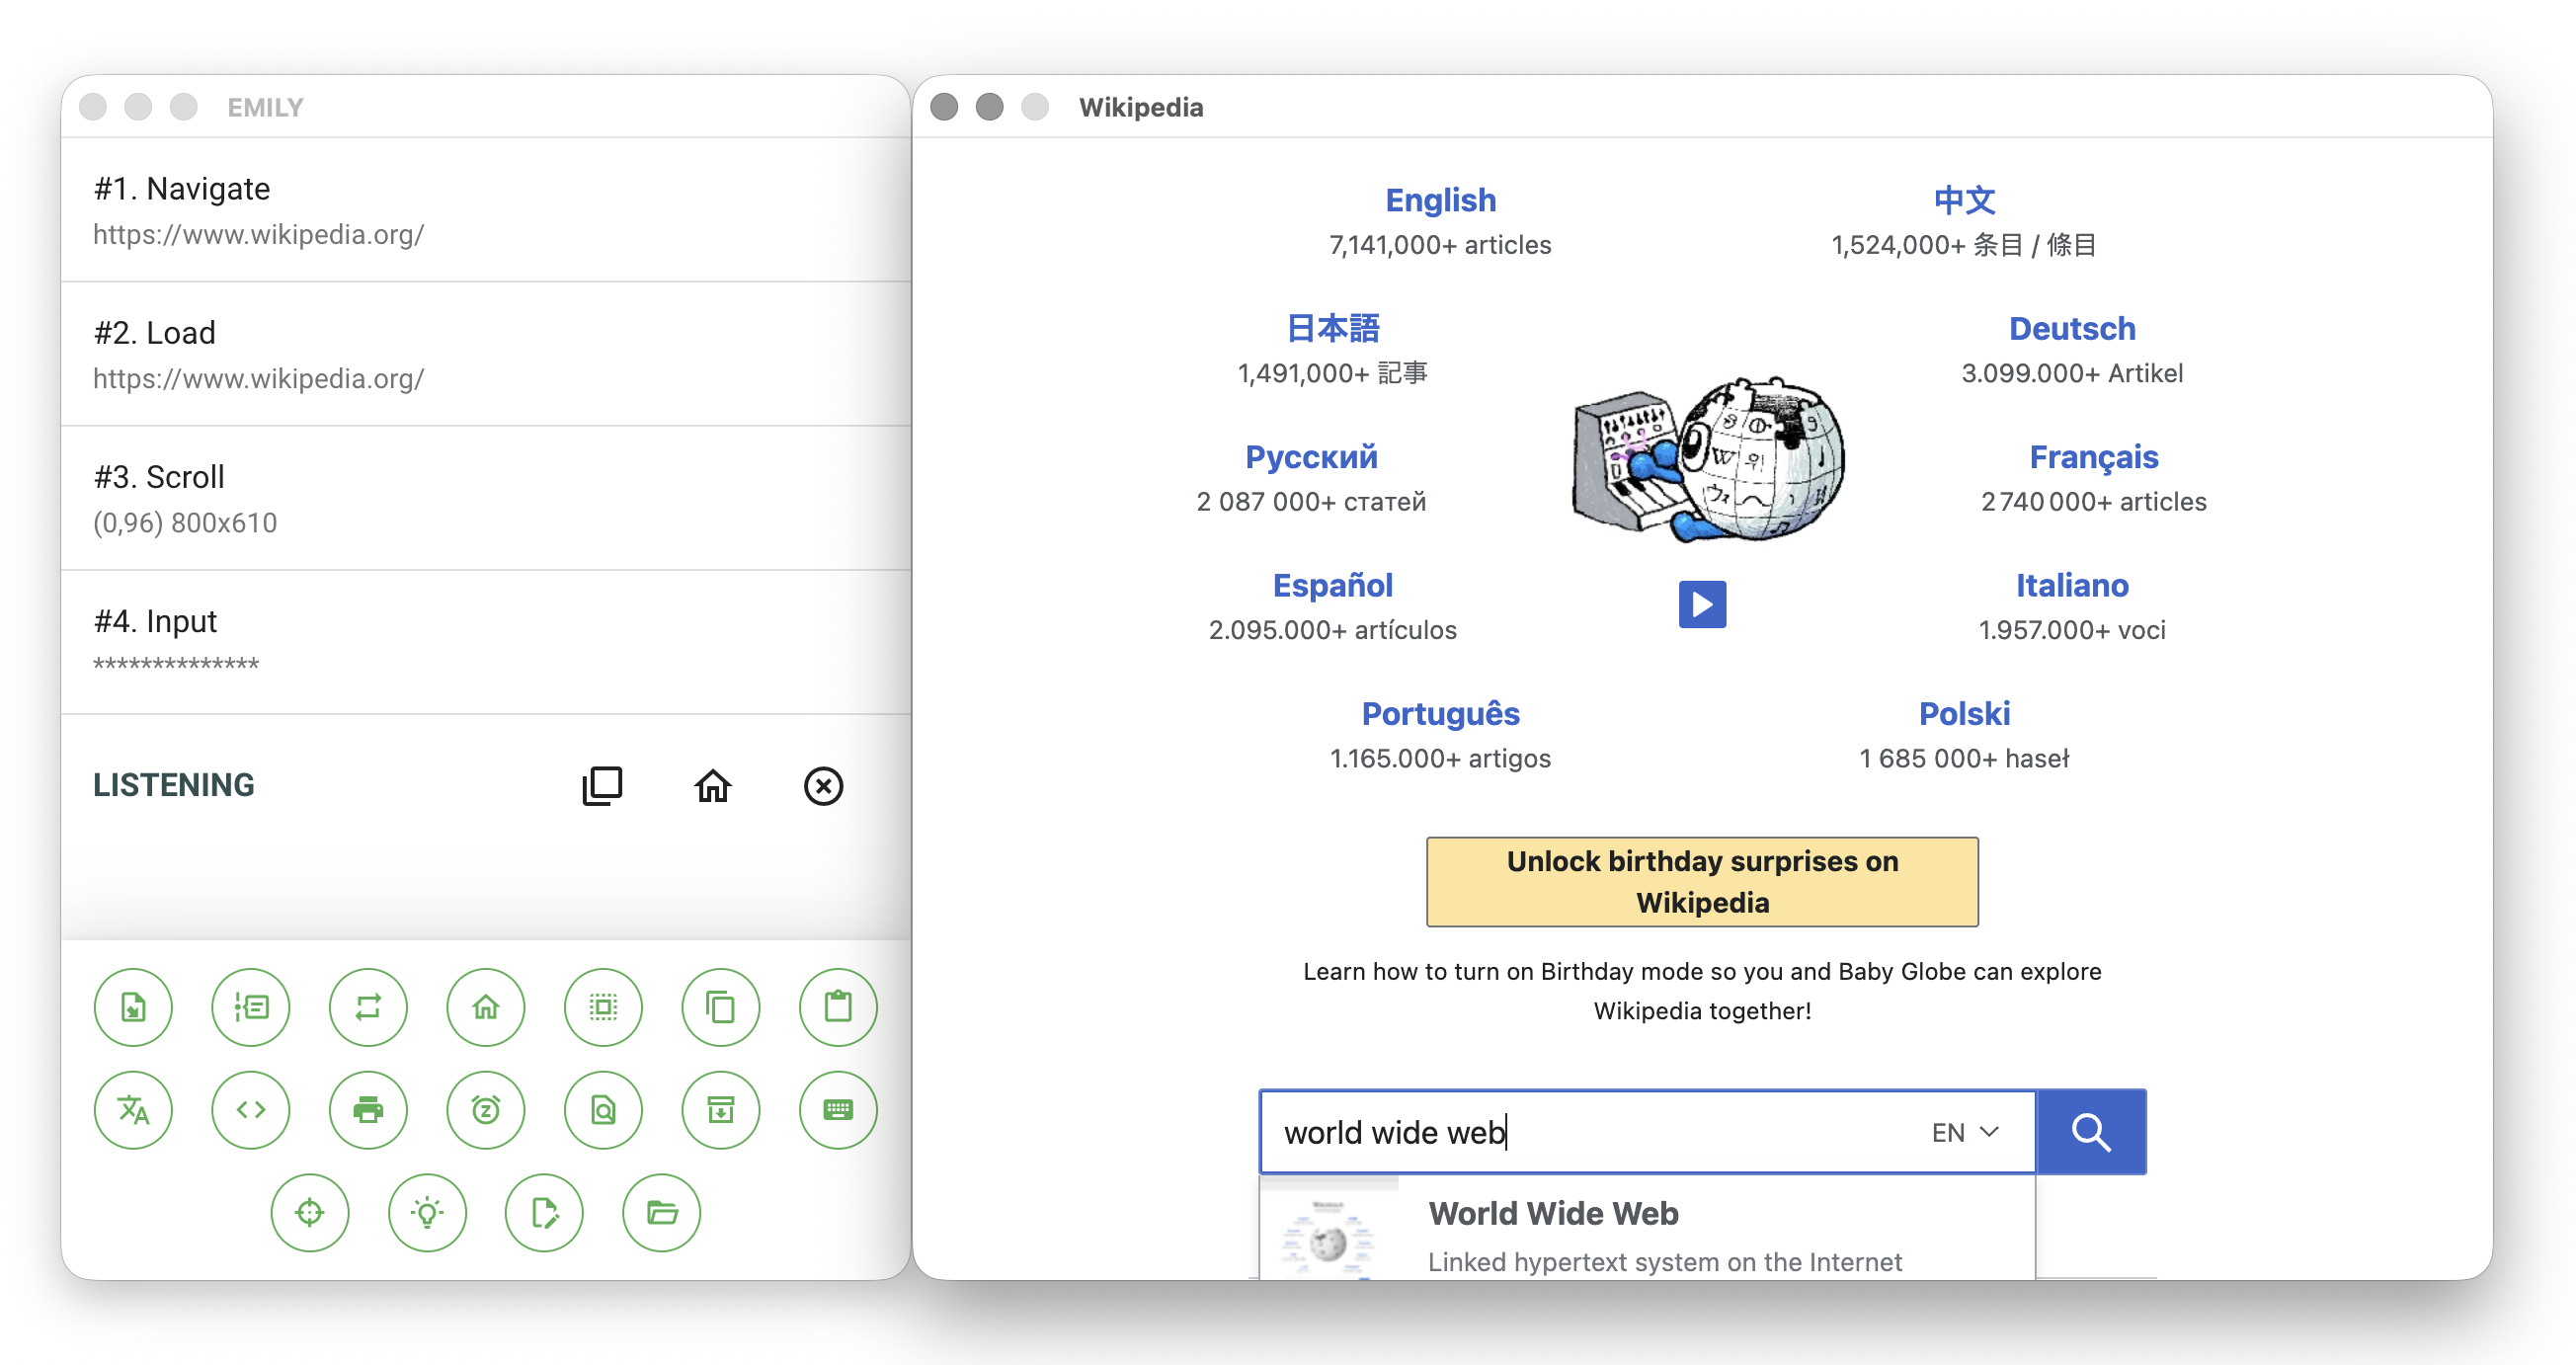
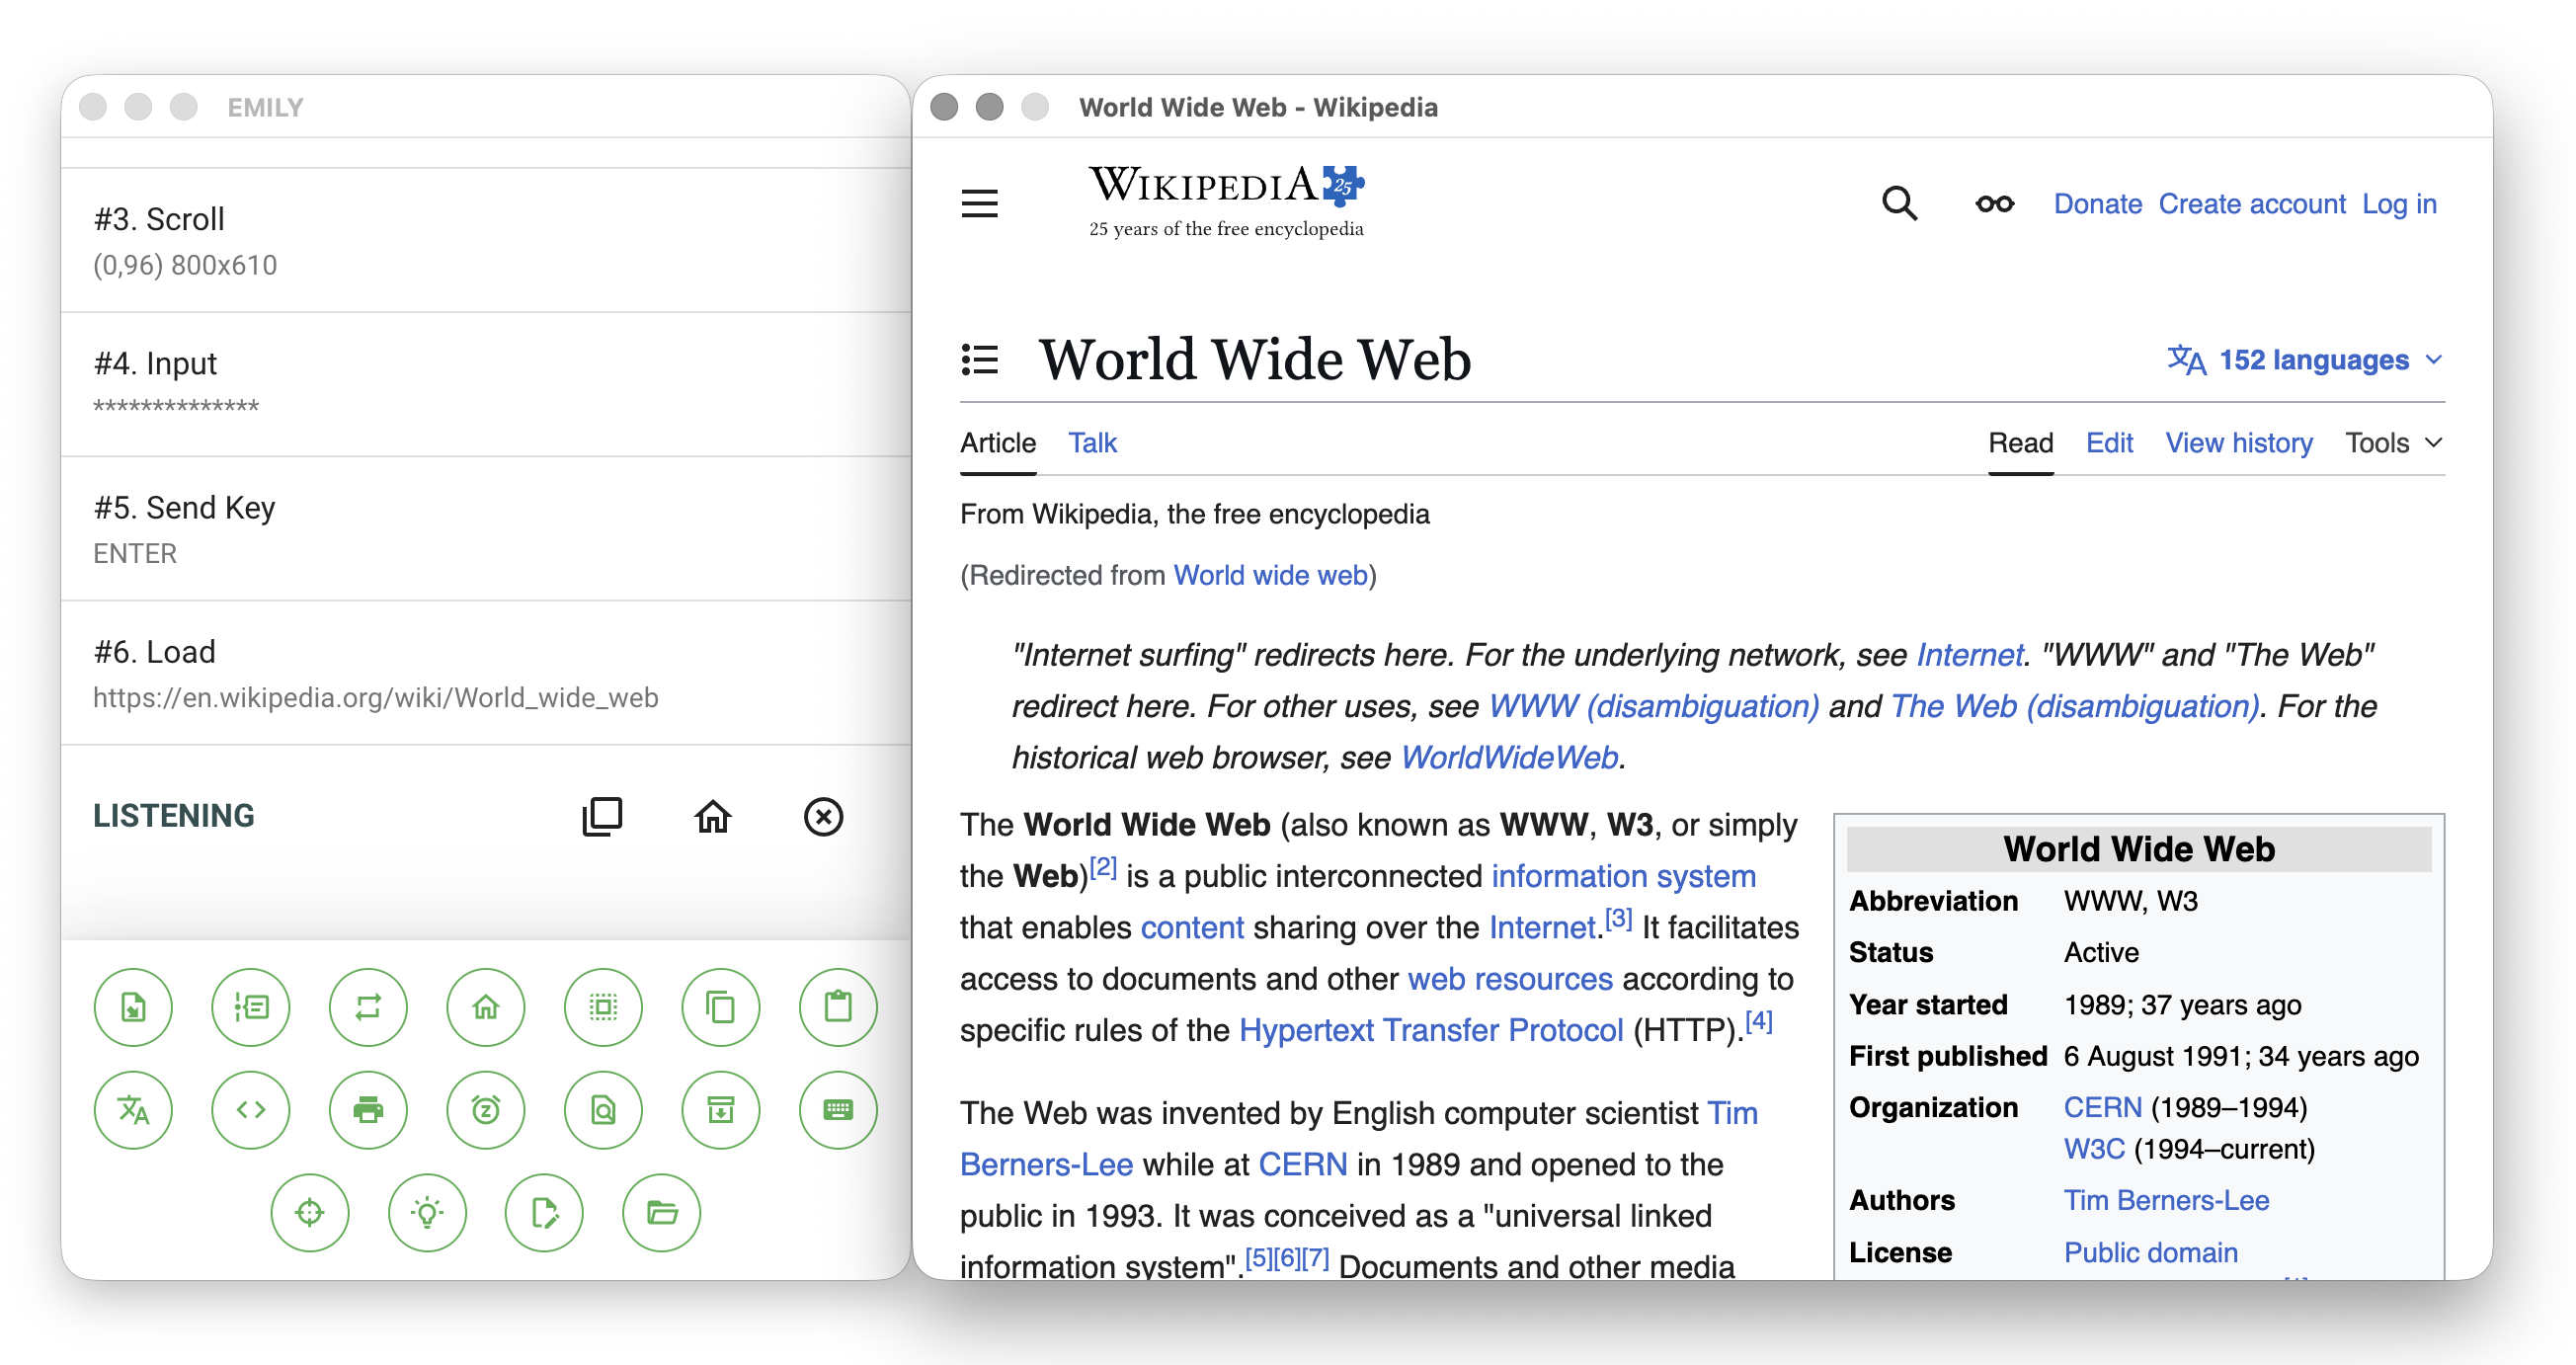
After typing, press ENTER. The browser will load a new page — the search results page shown below. The command list in the main window now includes each step of your interaction with the webpage. This is the fundamental principle of workflow design.
Use the "Print Output" Tool
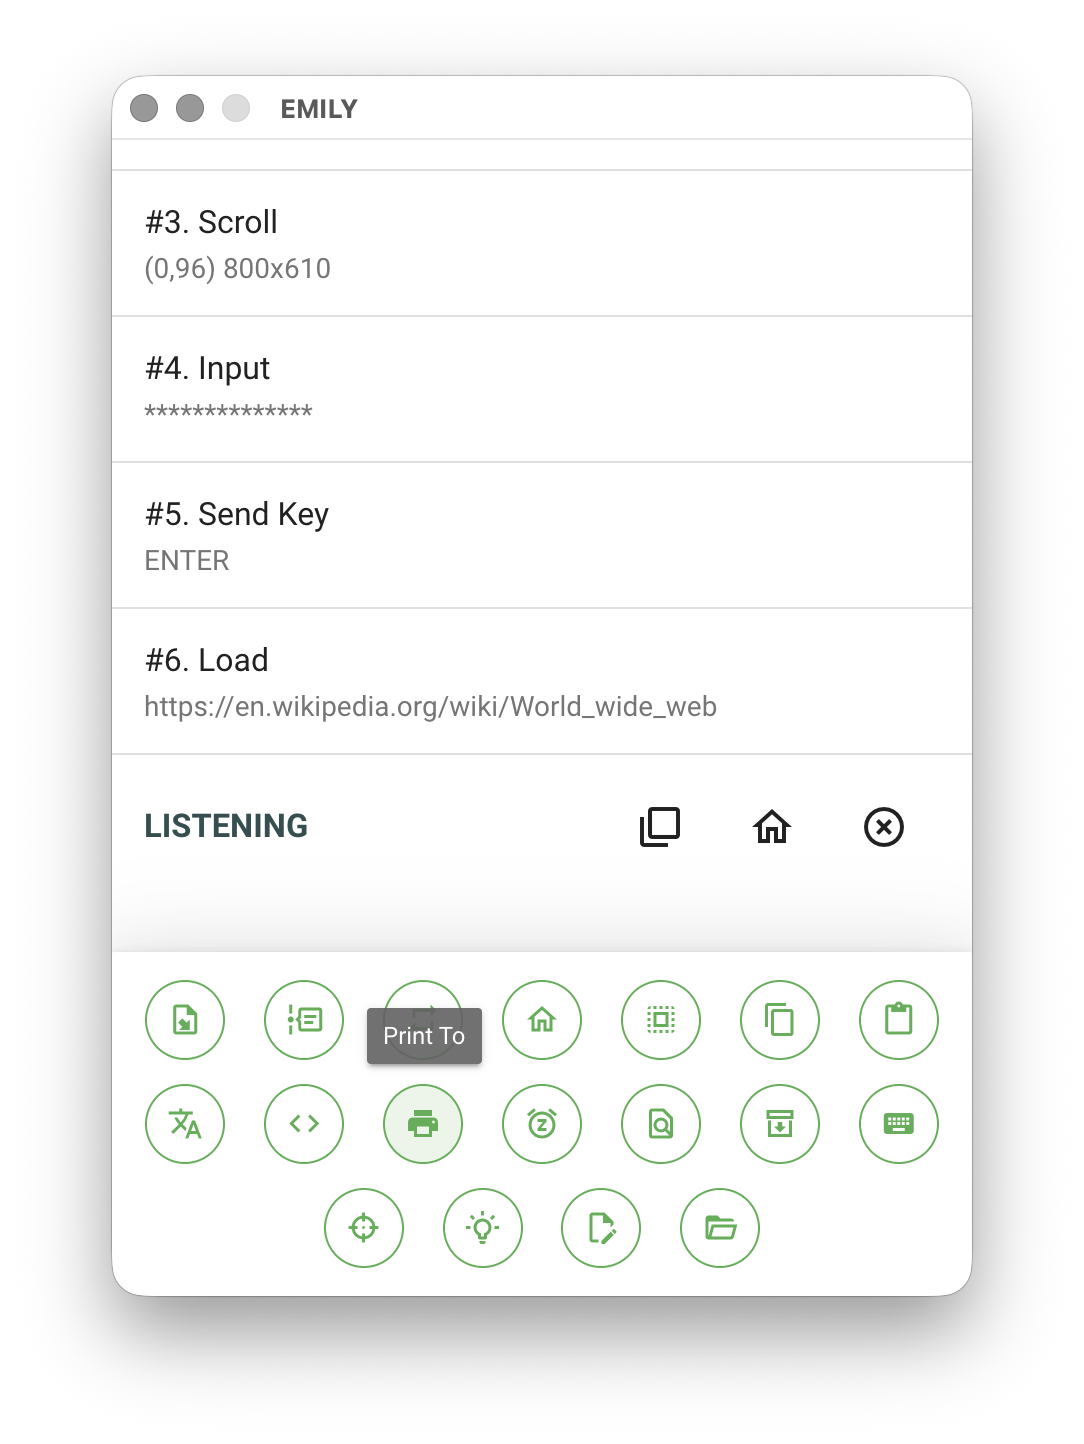
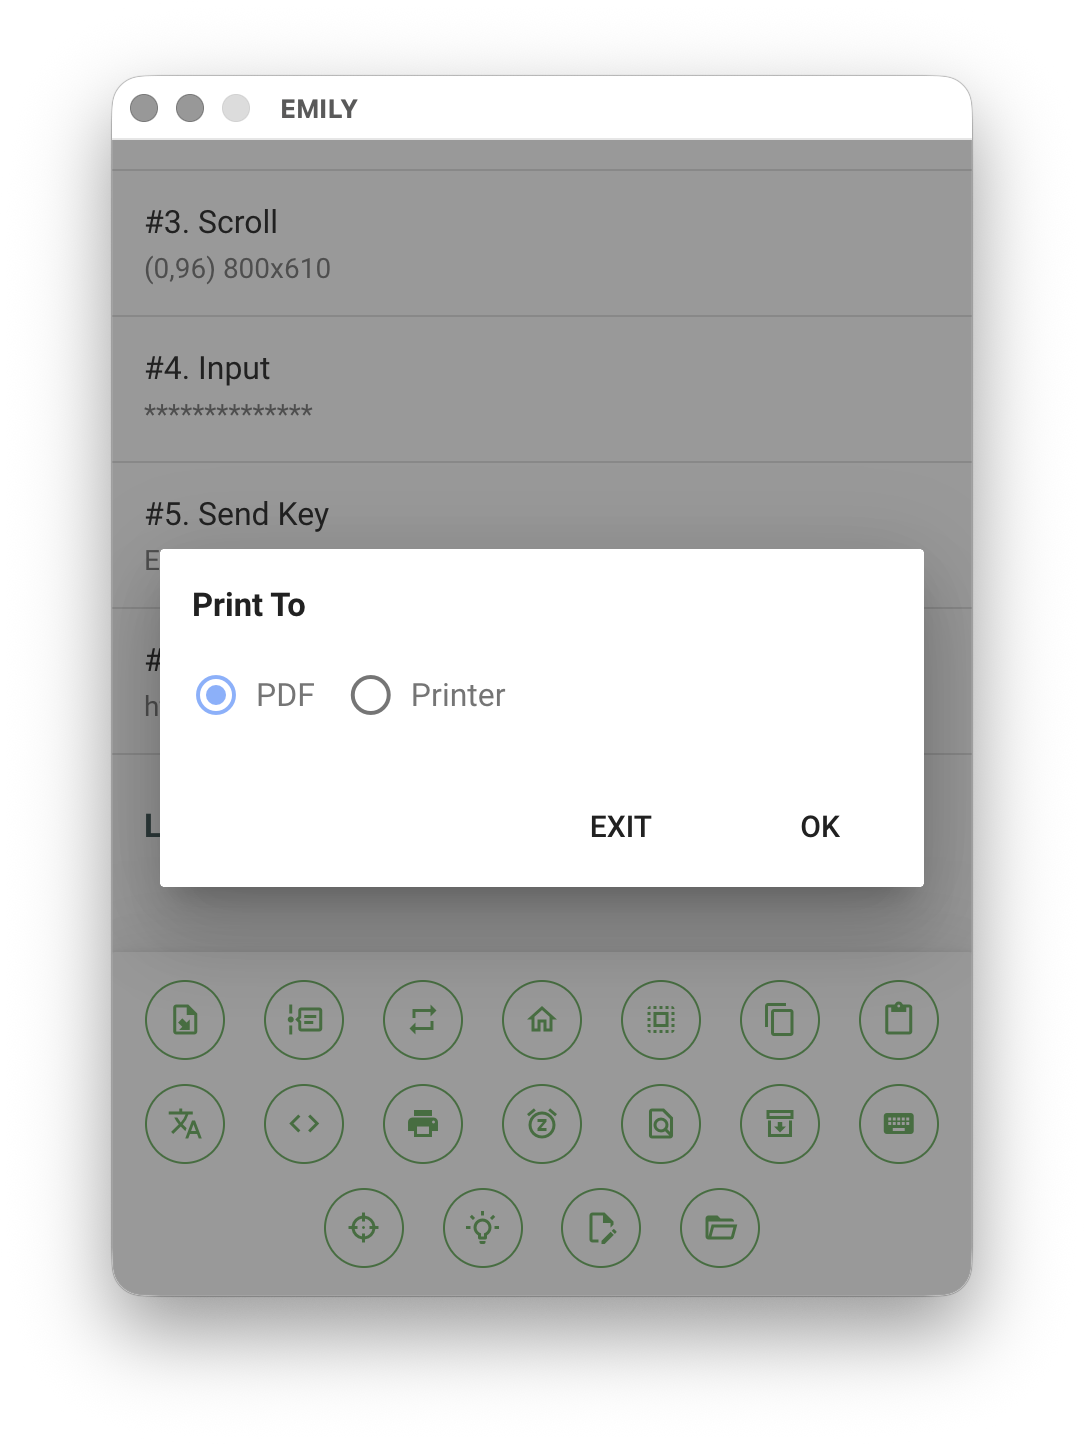
Now we want to export the webpage as a PDF file. Find and click the "Print Output" tool icon at the bottom of the main window, select "PDF", and click OK.
A "Print Webpage" dialog will pop up. Change the file name to wiki.pdf. The default save folder should be tmp and doesn't need to be changed — just click "Save".

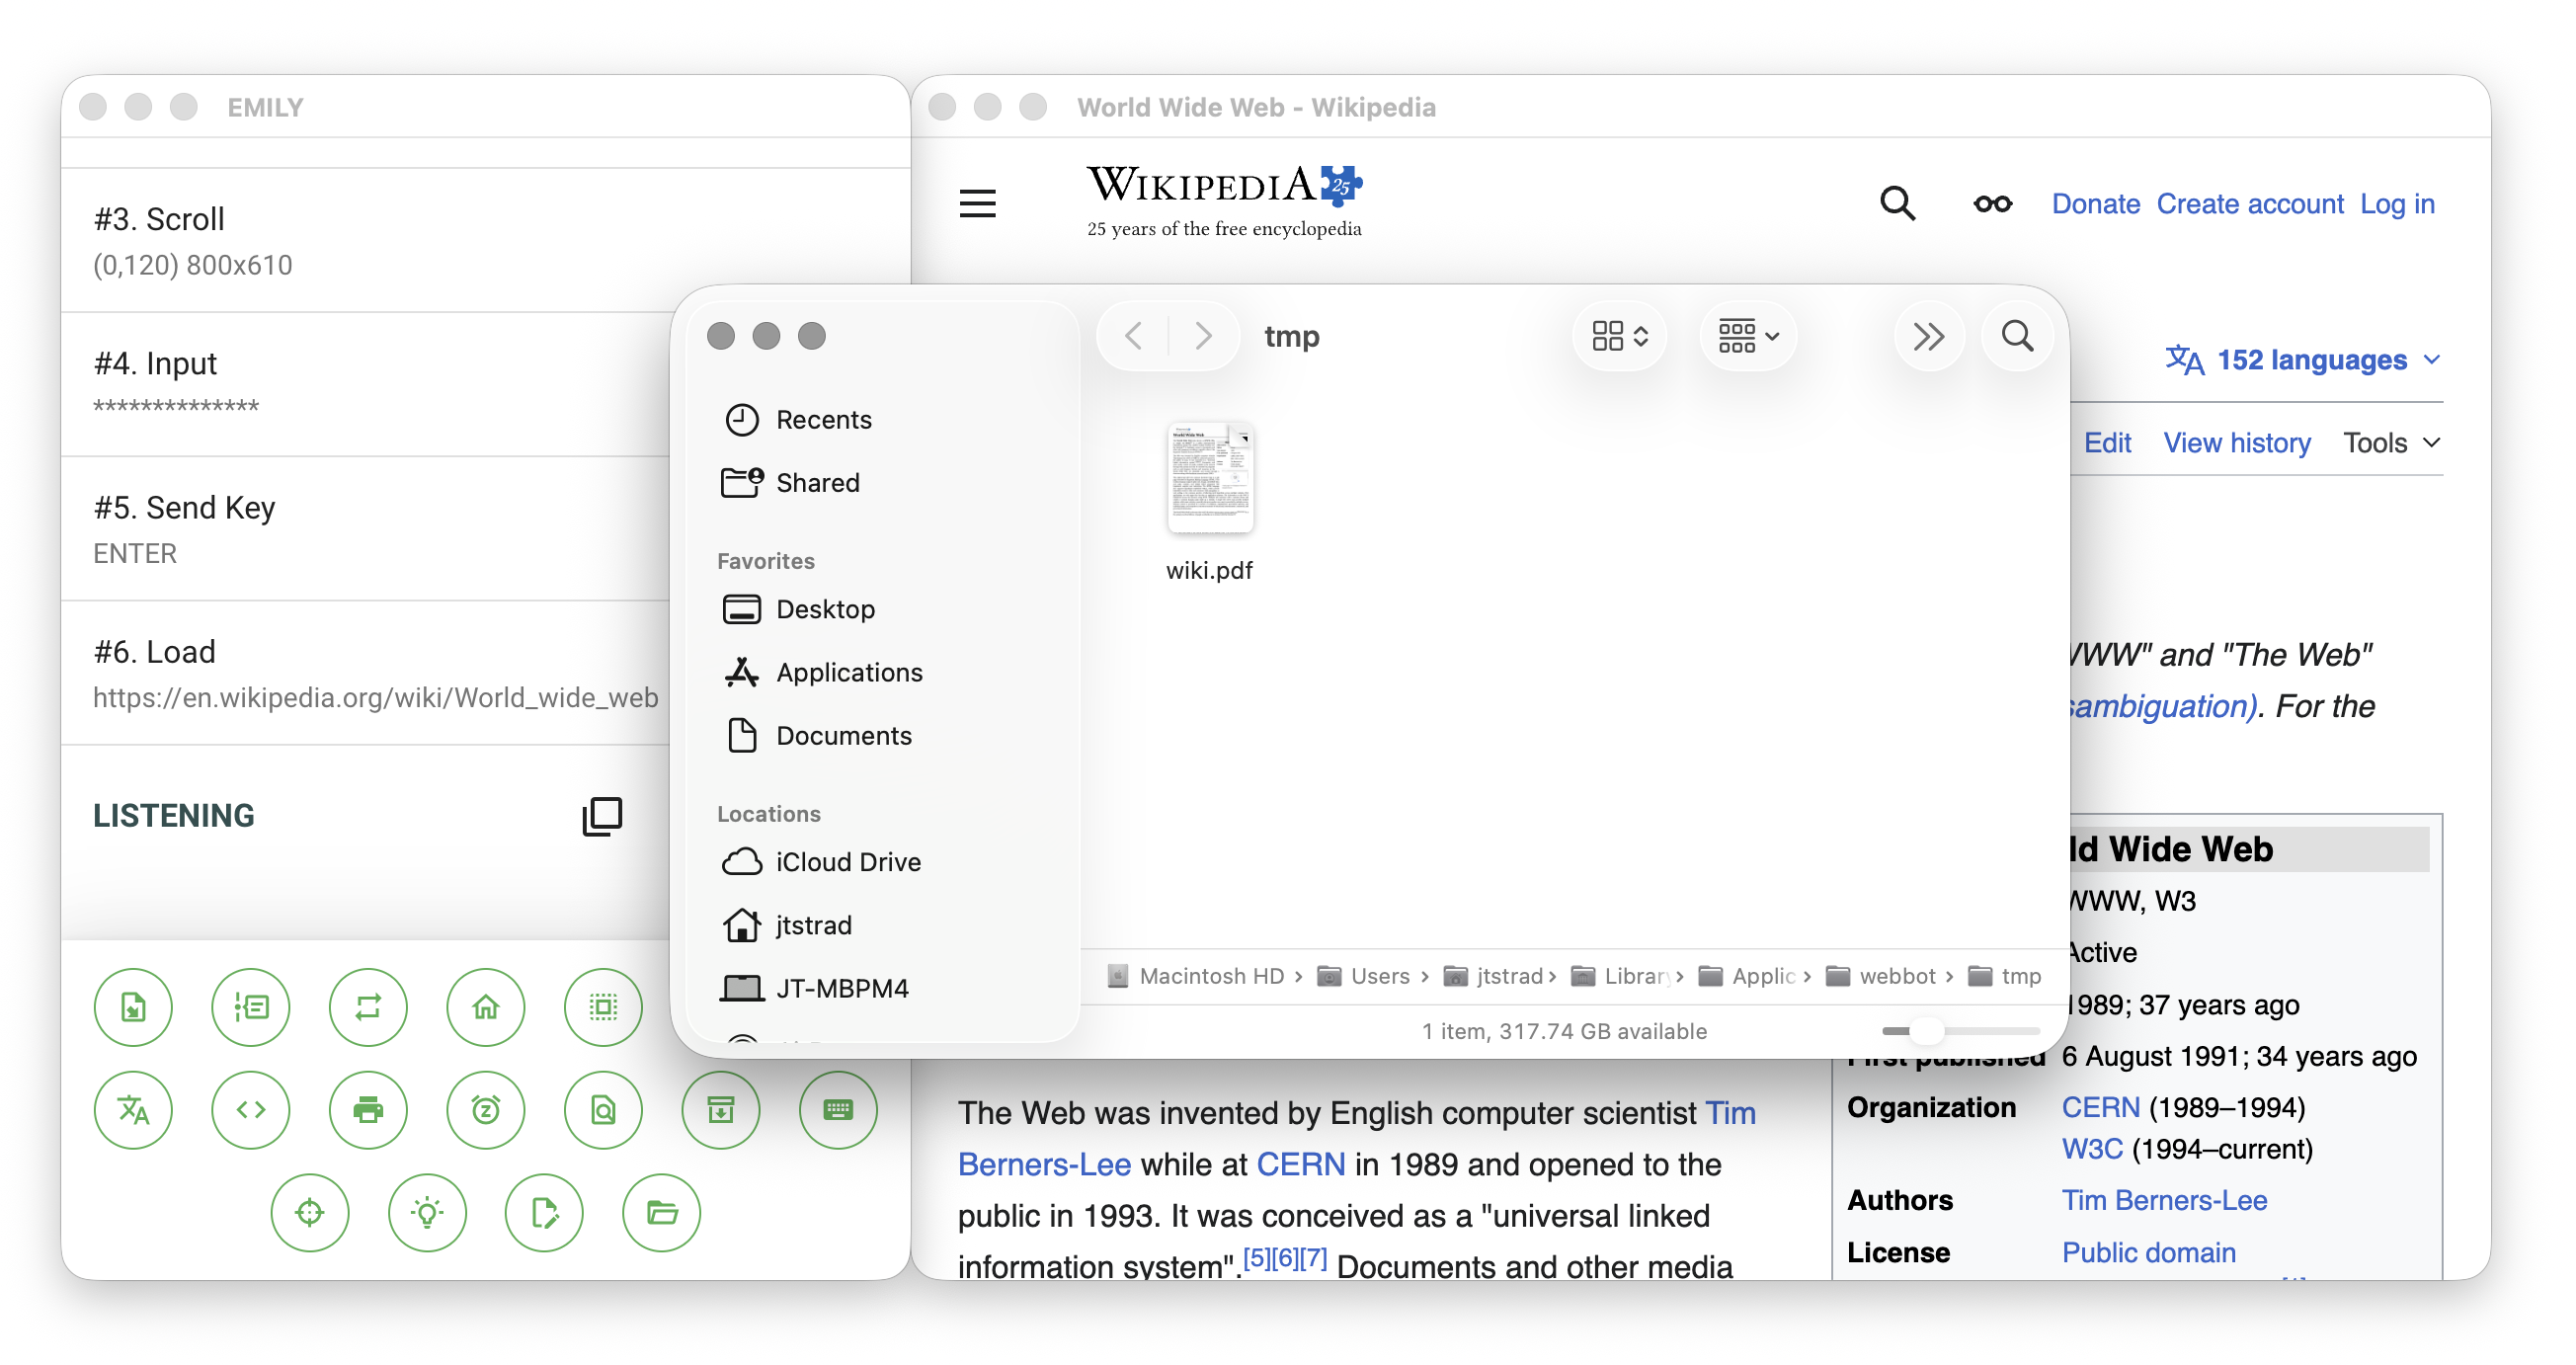
Now click the "Working Folder" tool icon at the bottom of the main window to open the file manager. The default folder is the tmp working folder. Verify that the webpage content has been correctly saved to the wiki.pdf file, then close the file manager.
Use an "Automation Module"
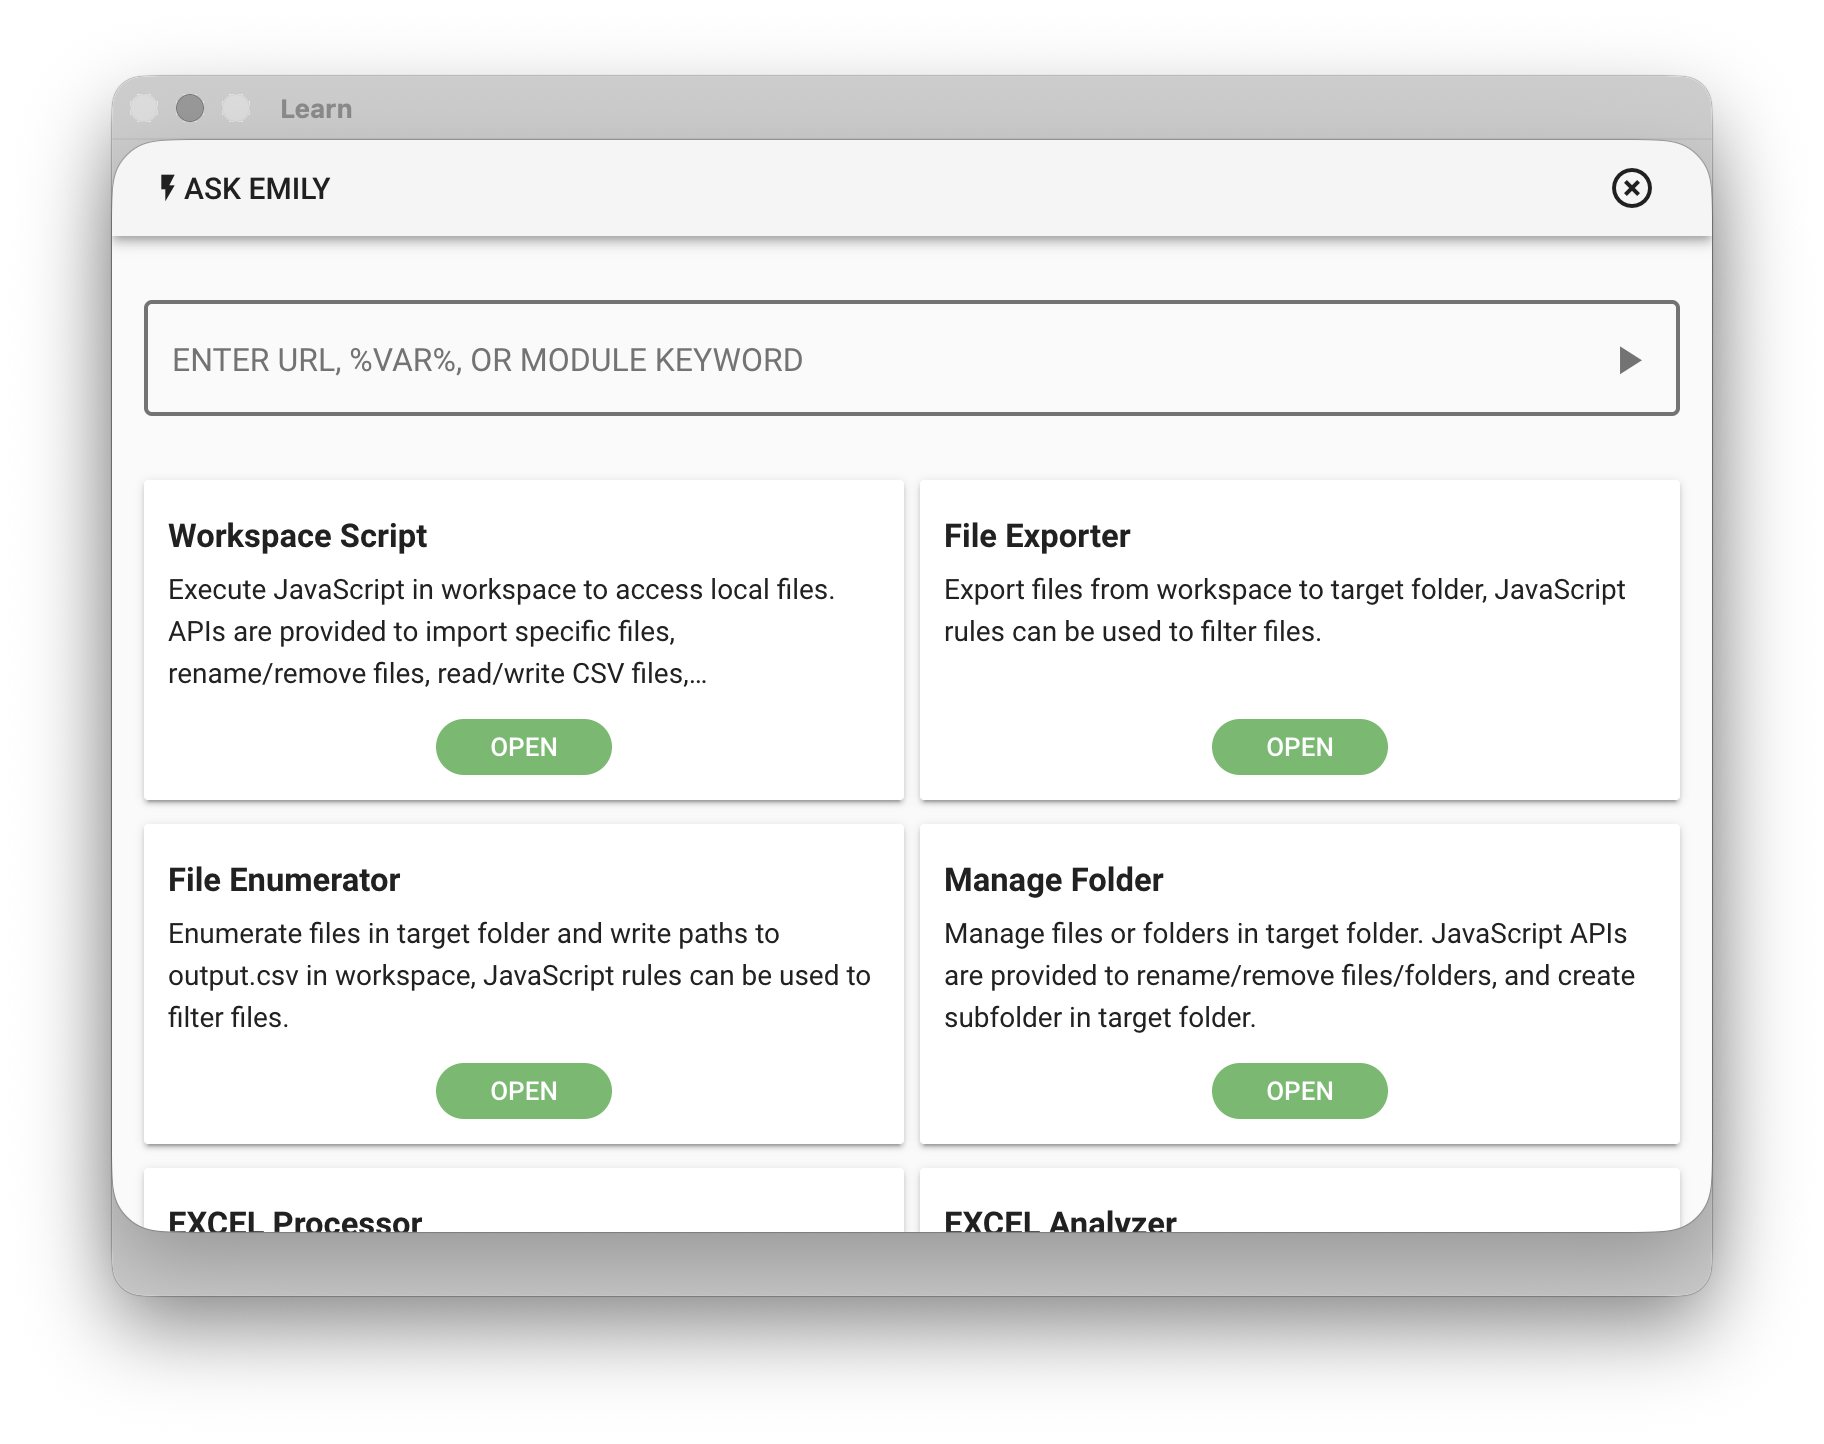
In EMILY.RPA, all automation controls other than web automation belong to "Automation Modules". Click the "Back to Design Home" tool in the main interface to return to the design home page, then select "Export Working Folder".
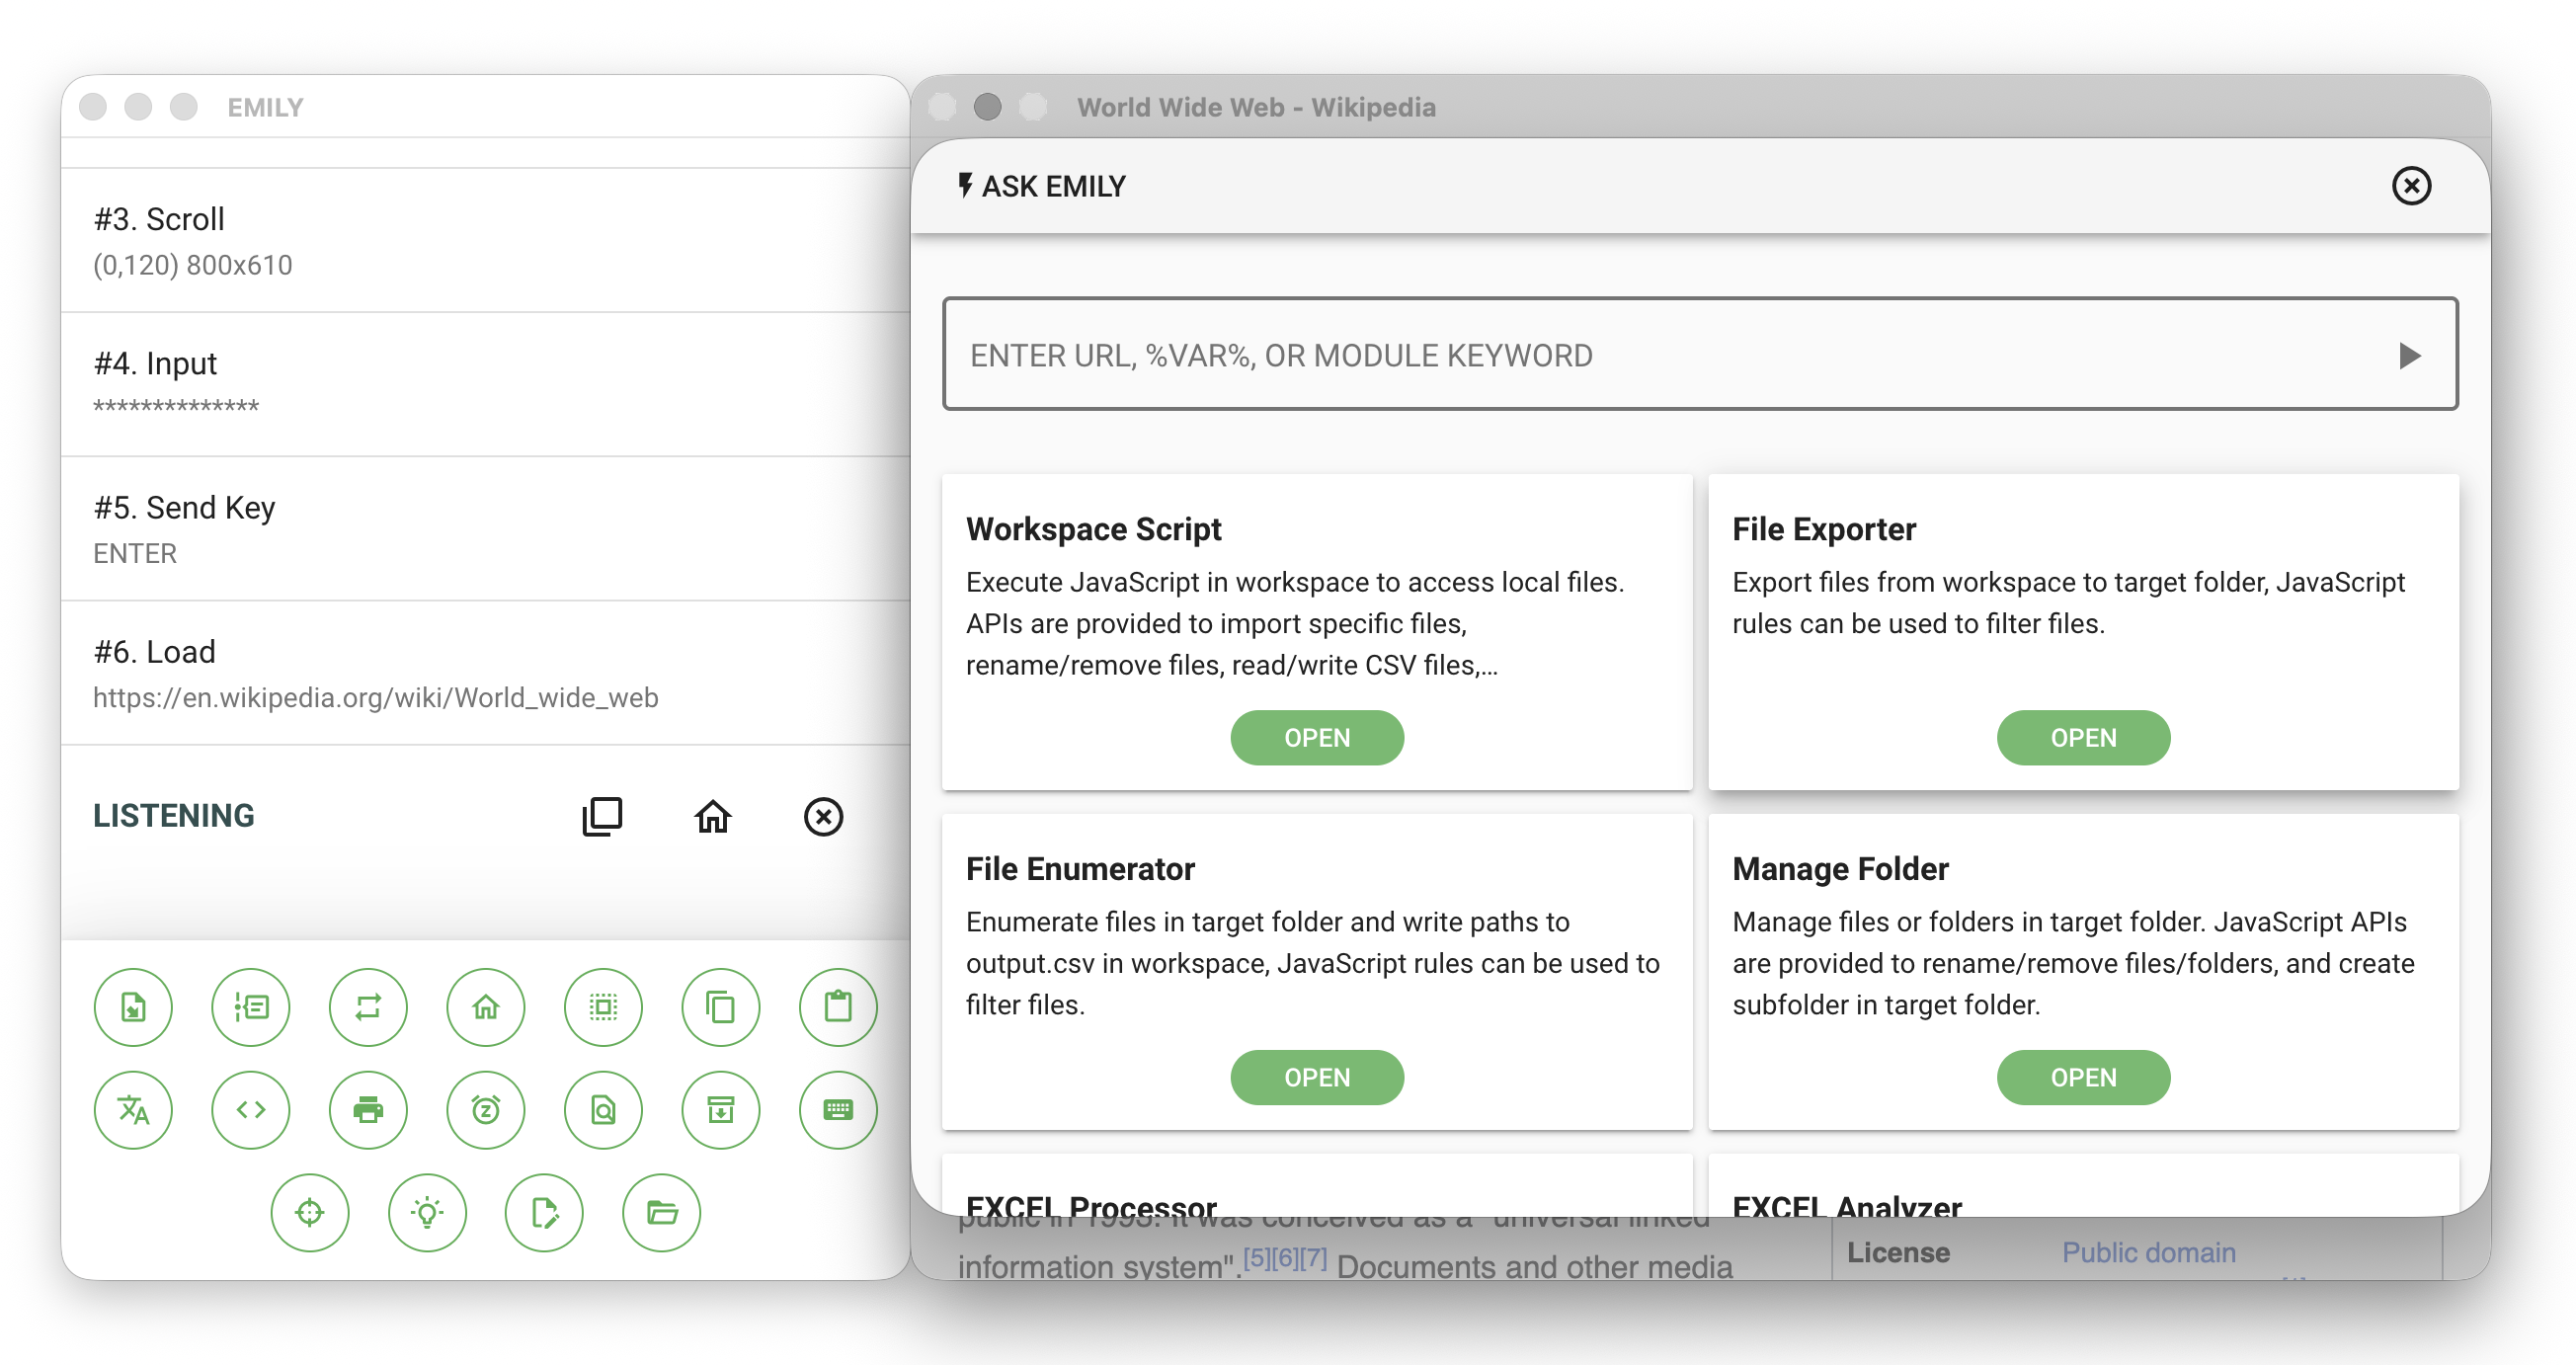
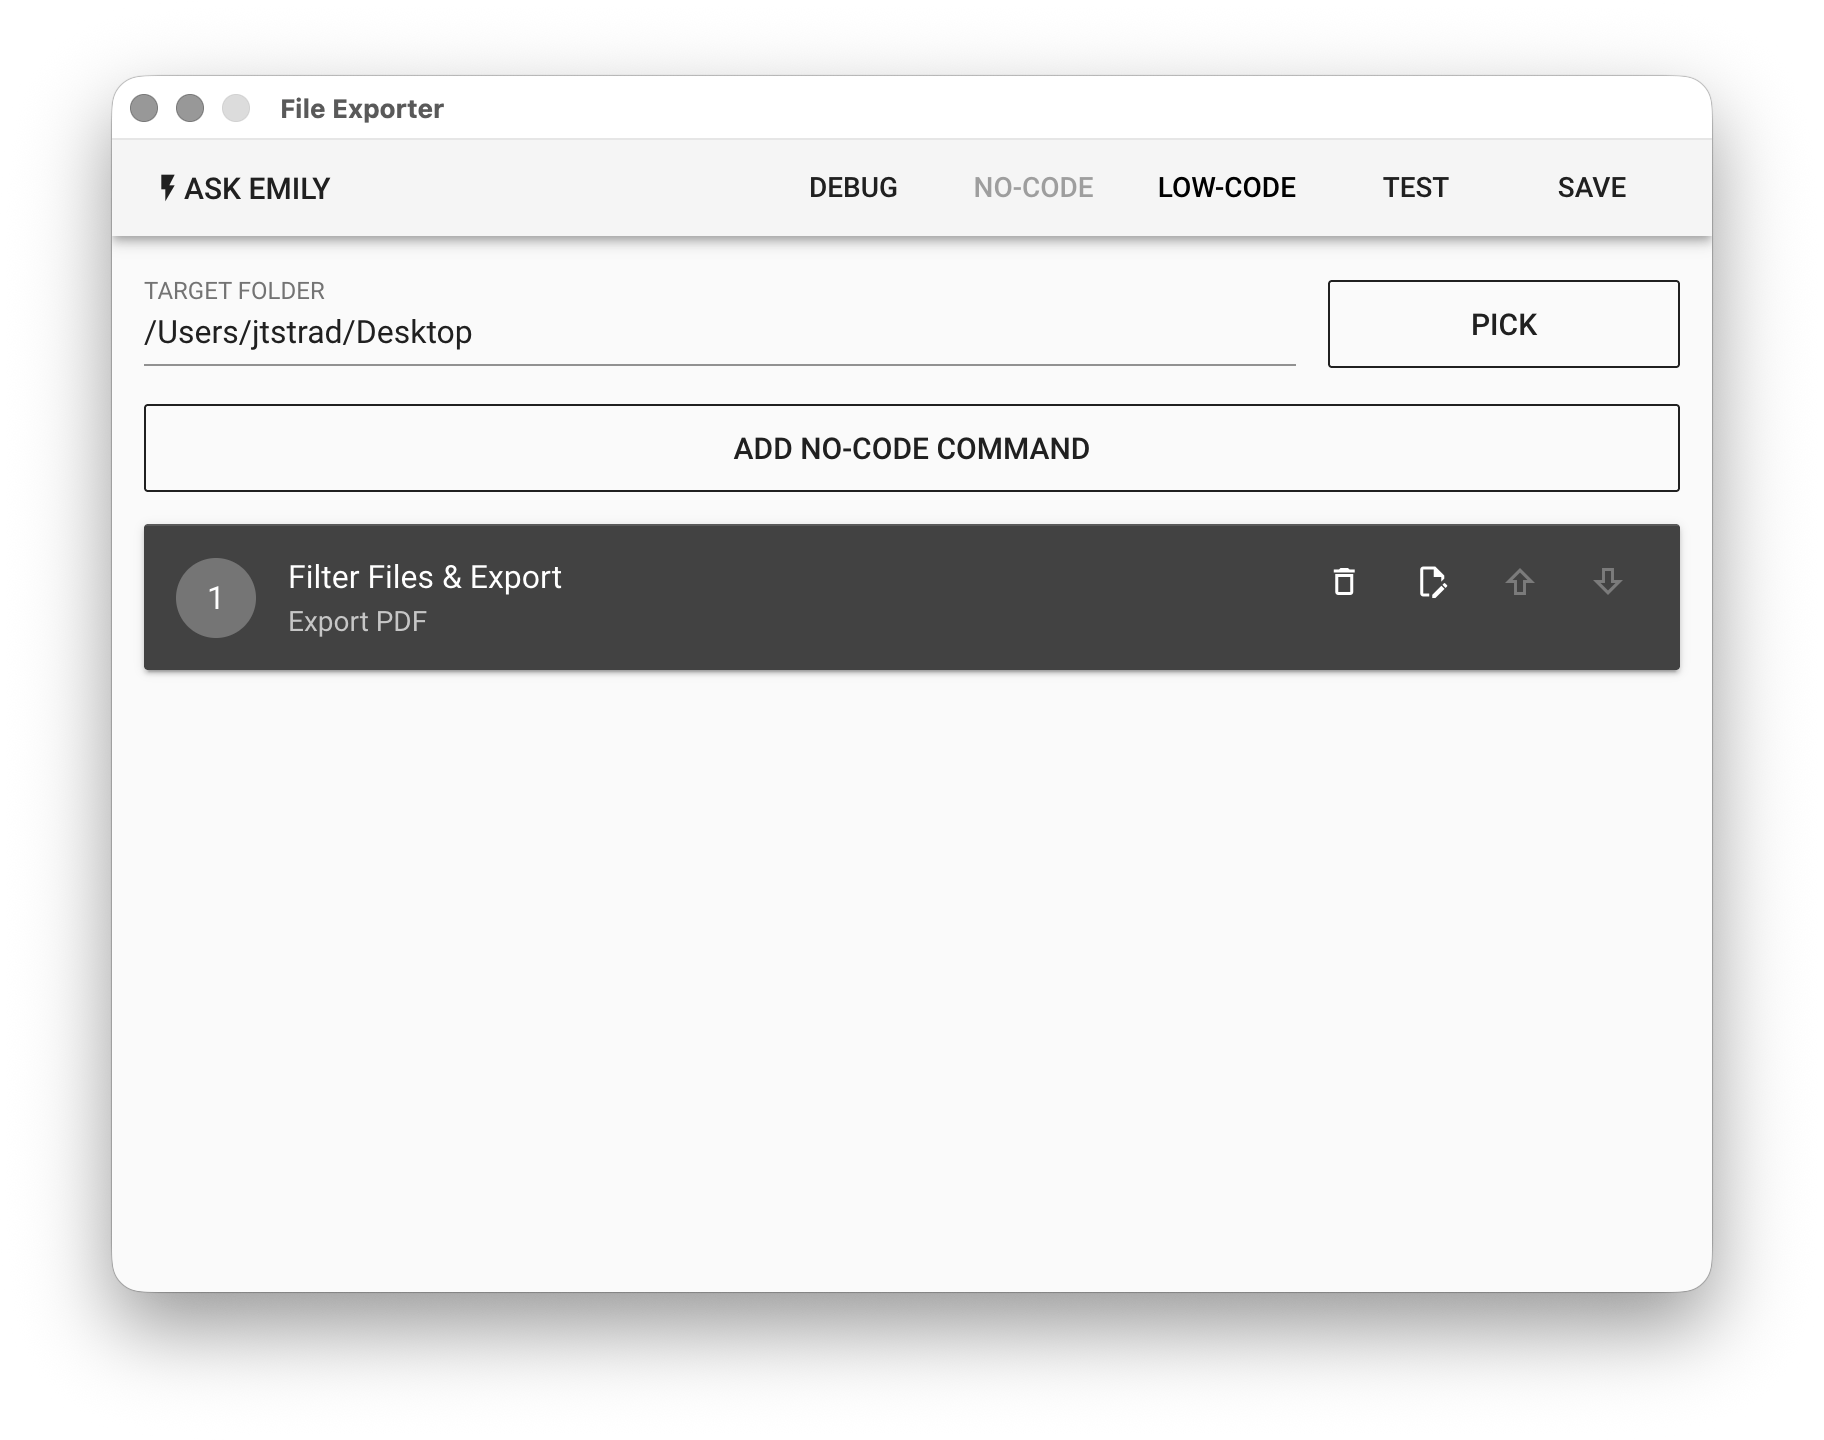
In the "Export Working Folder" module interface, first click the "PICK" button and select the Desktop folder as the export destination. Then click "ADD NO-CODE COMMAND" and choose the "Filter Files then Export" command. In the HINT field, enter something descriptive like Export output PDF. In the FILTER field below, enter wiki.pdf, then click "OK".

The "Export Working Folder" module is now configured with a no-code command "Filter Files then Export" that will export wiki.pdf to the specified folder — the Desktop folder selected in FOLDER. The final step in the module setup is to click "SAVE" in the upper right corner to record this module's configuration into the skill.
Complete the Skill Recording
After clicking the "SAVE" button in the automation module, the main interface adds the module as a command in the workflow. EMILY.RPA skills describe workflow operations through the recording of various commands. A workflow can consist of multiple websites and multiple automation modules with no quantity limit, making it possible to complete complex and lengthy tasks. Once all commands have been recorded, click "Finish".
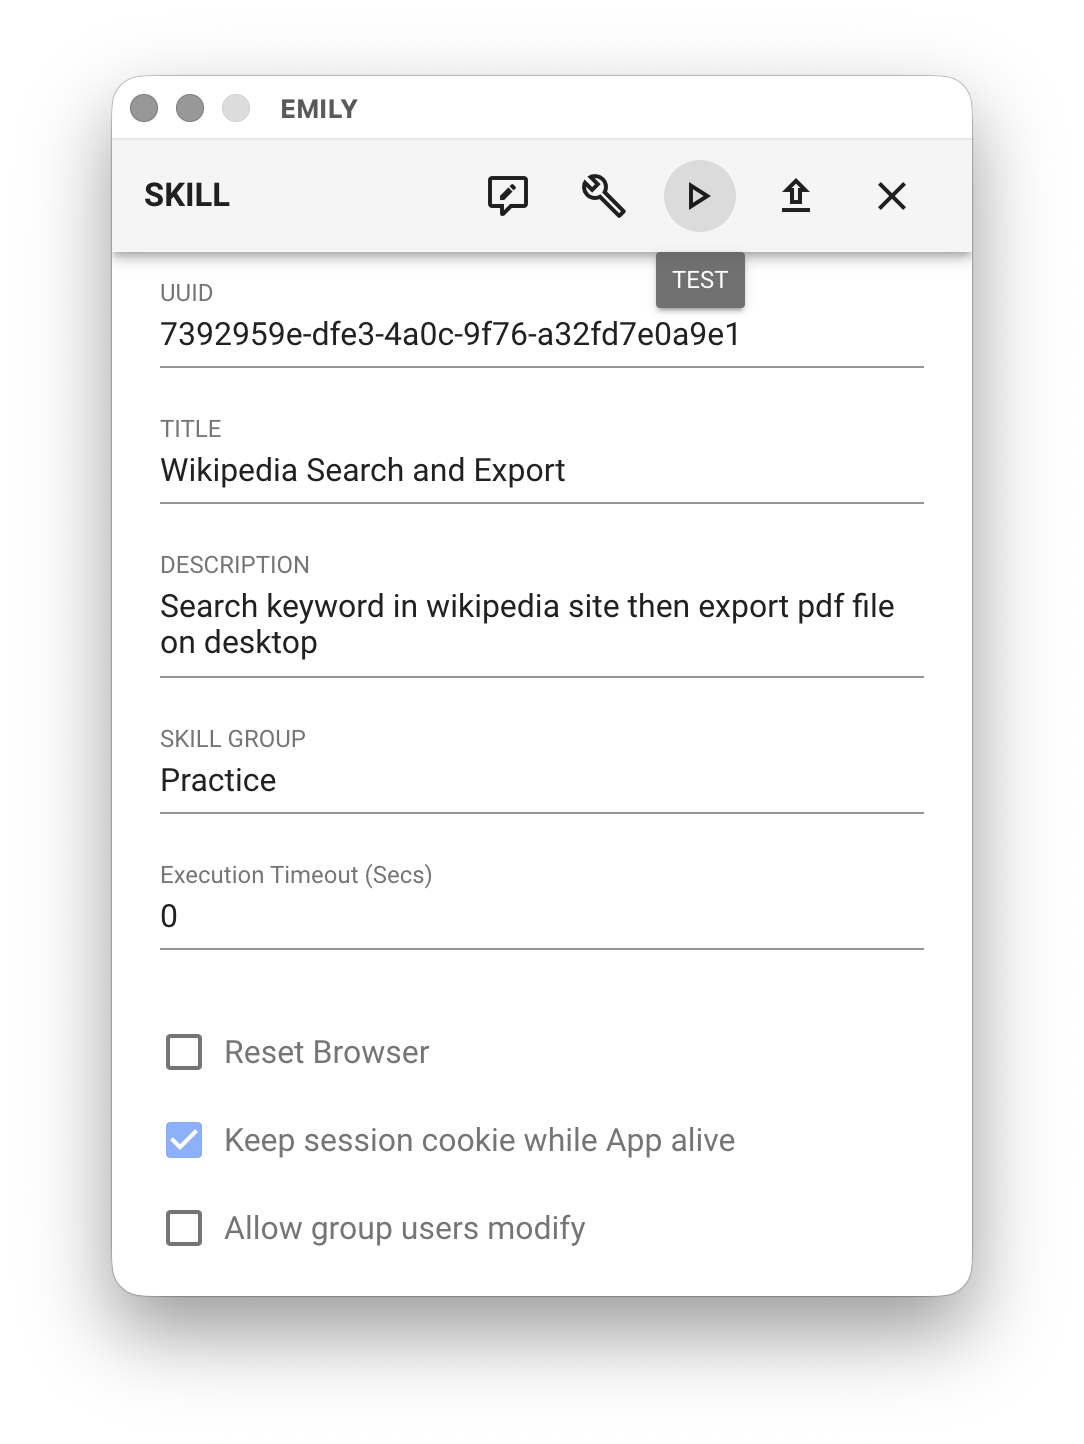
The final step is to fill in the Name and Description fields for the recorded skill. Although these are not required, they are very helpful for future management and further applications, so we recommend filling them in carefully. In the header area of the interface, you can click "Test" — EMILY.RPA will execute each recorded command step by step to confirm the workflow achieves its goal. Then click the "Upload" button next to Test to upload and back up the skill to the cloud Skill Hub, which also saves it locally.
Congratulations! You've just completed your first EMILY.RPA automation skill. The skill you uploaded will now appear on the "My Skills" page. Click the play button on the right side of the skill to execute it.
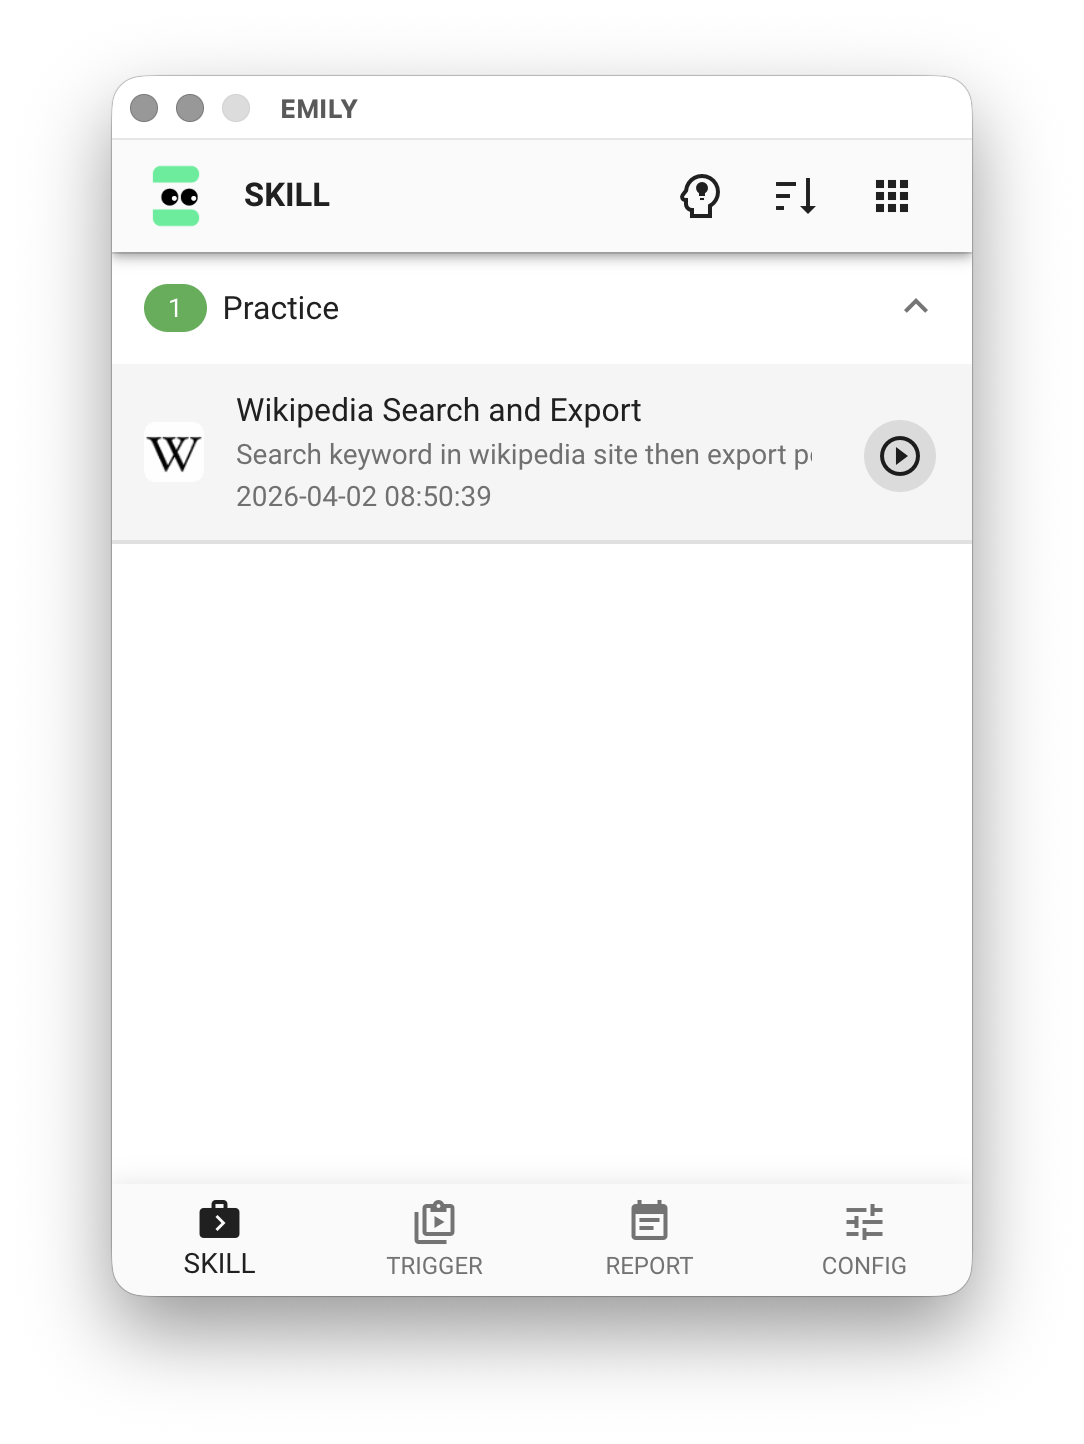
Alternatively, clicking the skill item itself opens a menu with management functions for that skill, such as: "Settings" for name, description, group, and input files; "Adjust" to add or delete commands in the workflow; trigger the skill via schedule, API, or web trigger; "Delete" the skill (but you can re-download a backed-up version from the Skill Hub); "Upload" the updated skill to the cloud Skill Hub; and finally, execute the skill with a specified working folder.
